How to Install CodeIgniter 4 on Ubuntu 18.04
CodeIgniter is one of the most popular PHP frameworks that was first released in 2006. The first developer of CodeIgniter was EllisLab which was then continued by the British Columbia Institute of Technology.
CodeIgniter 4 was just released on February 24, 2020. The date was chosen as a tribute to Jim Parry who was the project lead of CodeIgniter who died on January 15, 2020.
Hosts Configuration
Configure the /etc/hosts file to define hosts. With this file we can simulate a local domain on a computer without having to use an internet domain or install a DNS server.
1 | sudo nano /etc/hosts |
Add myci.local host
1 | 127.0.0.1 myci.local |
Install Apache
Install Apache web server
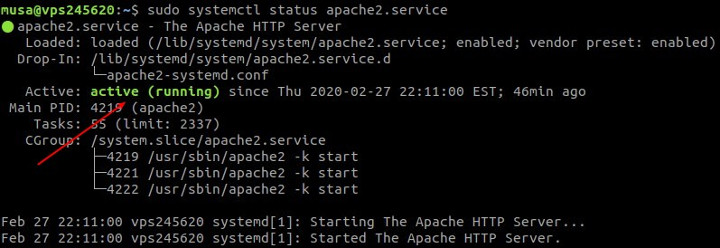
1 2 3 | sudo apt update sudo apt install apache2 -y sudo systemctl status apache2 |
Apache service status must be active (running)
Install PHP
Install PHP with the extensions
1 2 | sudo apt install php libapache2-mod-php php-cli php-common php-mbstring php-gd php-intl php-xml php-mysql php-zip php-json php-curl -y sudo systemctl restart apache2 |
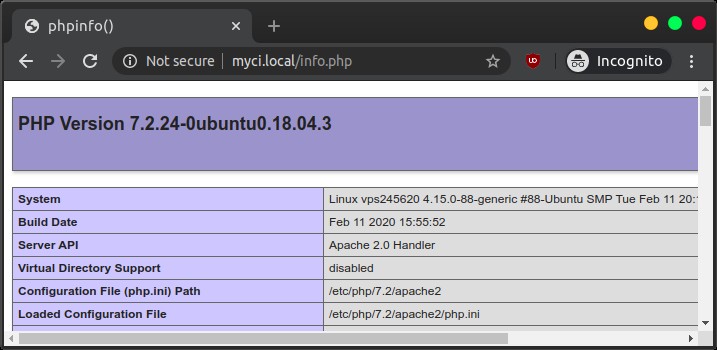
Test the results of installing PHP by creating a PHP Info file
1 2 | cd /var/www/html sudo nano info.php |
Call the phpinfo () function
1 | <?php phpinfo(); ?> |
Browse http://myci.local/info.php
Install MariaDB
Install MariaDB database
1 2 | sudo apt install mariadb-server -y sudo systemctl status mariadb |
The mariadb service must be active (running)

Secure the MariaDB installation
1 | sudo mysql_secure_installation |
Answer the questions given
1 2 3 4 5 6 | Enter current password for root (enter for none): ENTER Set root password? [Y/n] y Remove anonymous users? [Y/n] y Disallow root login remotely? [Y/n] y Remove test database and access to it? [Y/n] y Reload privilege tables now? [Y/n] y |
Login MariaDB and create a database and user for myci
1 2 3 4 5 6 | sudo mysql -u root -p create database myci; create user 'myci'@'localhost' identified by 'secret'; grant all privileges on myci.* to 'myci'@'localhost'; flush privileges; exit; |
Install CodeIgniter
CodeIgniter can be installed in 3 ways, manual installation, composer installation, and git installation. The method used in this tutorial is manual installation.
Download CodeIgniter 4 latest release
1 | wget -c https://github.com/codeigniter4/CodeIgniter4/archive/4.0.2.tar.gz -O CodeIgniter-4.0.2.tar.gz |
Extract CodeIgniter
1 | tar xzvf CodeIgniter-4.0.2.tar.gz |
Move the extracted folder and rename to myci.local
1 | sudo mv CodeIgniter4-4.0.2 /var/www/myci.local |
Change the owner and folder permissions
1 2 3 | cd /var/www sudo chown -R .www-data myci.local sudo chmod -R 775 myci.local |
Configure the Apache virtual host for myci.local
1 2 | cd /etc/apache2/sites-available sudo nano myci.local.conf |
Enter the virtual host configuration
1 2 3 4 5 6 7 8 9 10 11 | <VirtualHost *:80> ServerName myci.local DocumentRoot /var/www/myci.local/public <Directory /var/www/myci.local/public> Options Indexes FollowSymLinks MultiViews AllowOverride All Require all granted </Directory> ErrorLog /var/log/apache2/myci.local_error.log CustomLog /var/log/apache2/myci.local_requests.log combined </VirtualHost> |
Activate virtual host and restart apache2 service
1 2 3 4 | sudo a2ensite myci.local.conf sudo a2enmod rewrite sudo systemctl restart apache2 sudo systemctl status apache2 |
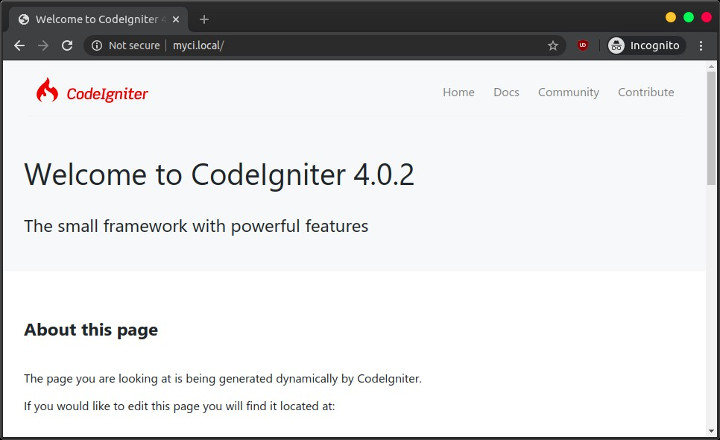
Browse http://myci.local
Database Connection Configuration
Open the database connection configuration file using a text editor. The configuration file is /var/www/myci.local/app/Config/Database.php.
Fill in a database connection
1 2 3 4 5 6 7 8 | ... public $default = [ 'DSN' => '', 'hostname' => 'localhost', 'username' => 'myci', 'password' => 'secret', 'database' => 'myci', ... |
Command Line Tool
CodeIgniter 4 has a command line tool called spark, run it in the project’s root folder.
1 2 | cd /var/www/myci.local php spark |
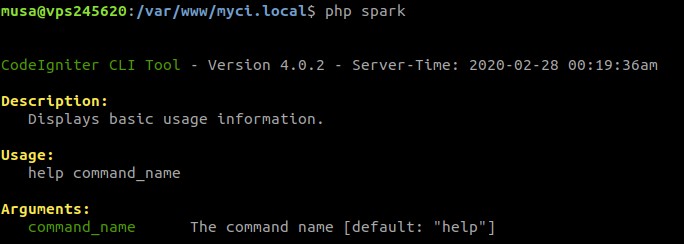
Showing help from the command
1 | php spark migrate help |
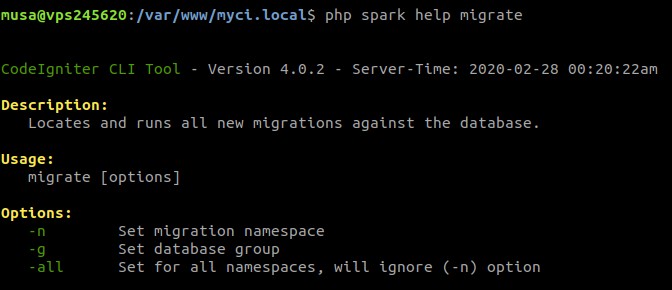
If you found this article helpful and would like to support my work, consider making a donation through PayPal. Your support helps me continue creating useful content and tutorials. Thank you!
Donate via PayPal: https://paypal.me/musaamin
I followed the CI configuration just right, but it does not load the homepage, it is blank.
try checking ErrorLog
same here, ErrorLog empty
Saya sudah mengikuti semua nya, pas dicek https://www.myci.local/ “Server Tidak Ditemukan”
Gimana Solusinya, Makasih
bikin dulu domain local pakai file /etc/hosts lalu config virtual host Apache