Cara Install CodeIgniter 4 di Ubuntu 18.04
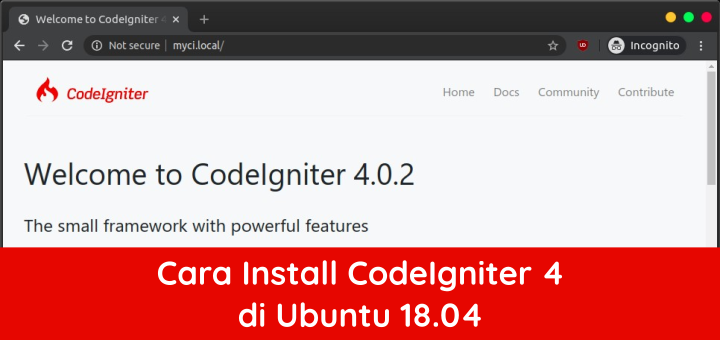
CodeIgniter adalah salah satu PHP framework paling populer yang pertama kali dirilis pada tahun 2006. Pengembang pertama dari CodeIgniter adalah EllisLab yang kemudian dilanjutkan oleh British Columbia Institute of Technology.
CodeIgniter 4 baru saja dirilis pada tanggal 24 Februari 2020. Tanggal tersebut dipilih sebagai penghormatan kepada Jim Parry yang merupakan project lead dari CodeIgniter yang meninggal pada 15 Januari 2020.
Konfigurasi hosts
Konfigurasi file /etc/hosts untuk mendefinisikan host. Dengan file ini kita bisa mensimulasikan domain lokal di komputer tanpa harus menggunakan domain internet atau menginstall DNS server.
1 | sudo nano /etc/hosts |
Masukkan
1 | 127.0.0.1 myci.local |
Install Apache
Install Apache web server
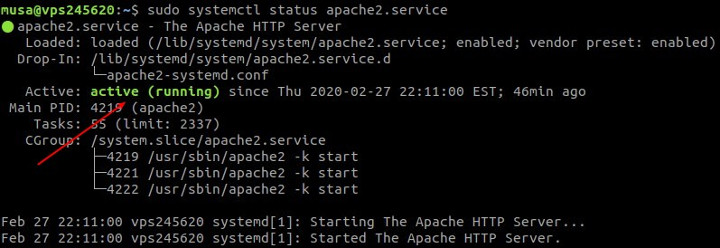
1 2 3 | sudo apt update sudo apt install apache2 -y sudo systemctl status apache2 |
Status service apache2 harus active / running
Install PHP
Install PHP beserta extension
1 2 | sudo apt install php libapache2-mod-php php-cli php-common php-mbstring php-gd php-intl php-xml php-mysql php-zip php-json php-curl -y sudo systemctl restart apache2 |
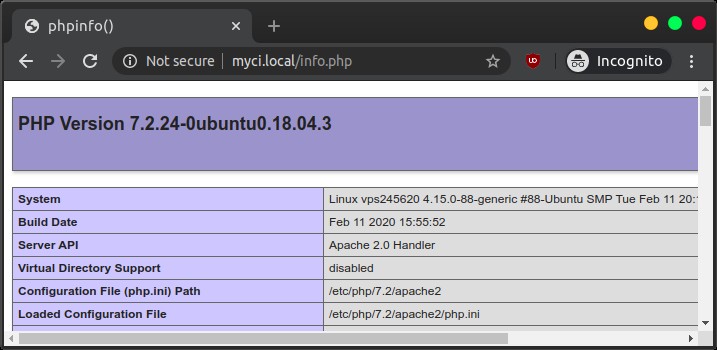
Uji hasil install PHP dengan membuat file PHP Info
1 2 | cd /var/www/html sudo nano info.php |
Isi dengan kode PHP yang memanggil fungsi phpinfo()
1 | <?php phpinfo(); ?> |
Browse http://localhost/info.php
Install MariaDB
Install MariaDB database
1 2 | sudo apt install mariadb-server -y sudo systemctl status mariadb |
Service mariadb harus active (running)

Amankan instalasi MariaDB
1 | sudo mysql_secure_installation |
Jawab pertanyaan yang diberikan
1 2 3 4 5 6 | Enter current password for root (enter for none): ENTER Set root password? [Y/n] y Remove anonymous users? [Y/n] y Disallow root login remotely? [Y/n] y Remove test database and access to it? [Y/n] y Reload privilege tables now? [Y/n] y |
Login MariaDB dan buat database dan user untuk myci
1 2 3 4 5 6 | sudo mysql -u root -p create database myci; create user 'myci'@'localhost' identified by 'secret'; grant all privileges on myci.* to 'myci'@'localhost'; flush privileges; exit; |
Install CodeIgniter
CodeIgniter dapat diinstall dengan 3 cara yaitu manual installation, composer installation, dan git installation. Cara yang digunakan di tutorial ini adalah manual installation.
Download CodeIgniter 4 rilis terbaru
1 | wget -c https://github.com/codeigniter4/CodeIgniter4/archive/4.0.2.tar.gz -O CodeIgniter-4.0.2.tar.gz |
Extract CodeIgniter
1 | tar xzvf CodeIgniter-4.0.2.tar.gz |
Pindahkan folder hasil extract dan ubah namanya menjadi myci.local
1 | sudo mv CodeIgniter4-4.0.2 /var/www/myci.local |
Ubah owner dan permission folder
1 2 3 | cd /var/www sudo chown -R $USER:www-data myci.local sudo chmod -R 775 myci.local |
Konfigurasi Apache virtual host untuk myci.local
1 2 | cd /etc/apache2/sites-available sudo nano myci.local.conf |
Masukkan konfigurasi virtual host
1 2 3 4 5 6 7 8 9 10 11 | <VirtualHost *:80> ServerName myci.local DocumentRoot /var/www/myci.local/public <Directory /var/www/myci.local/public> Options Indexes FollowSymLinks MultiViews AllowOverride All Require all granted </Directory> ErrorLog /var/log/apache2/myci.local_error.log CustomLog /var/log/apache2/myci.local_requests.log combined </VirtualHost> |
Aktifkan virtual host dan restart apache2 service
1 2 3 4 | sudo a2ensite myci.local.conf sudo a2enmod rewrite sudo systemctl restart apache2 sudo systemctl status apache2 |
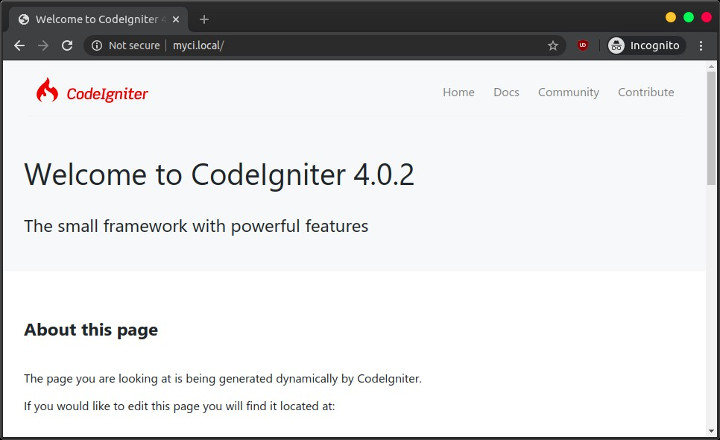
Browse http://myci.local
Konfigurasi Koneksi Database
Buka file konfigurasi koneksi database dengan menggunakan text editor. File konfigurasinya /var/www/myci.local/app/Config/Database.php.
Isi koneksi database
1 2 3 4 5 6 7 8 | ... public $default = [ 'DSN' => '', 'hostname' => 'localhost', 'username' => 'myci', 'password' => 'secret', 'database' => 'myci', ... |
Command Line Tool
CodeIgniter 4 memiliki command line tool bernama spark, jalankan di folder root project.
1 2 | cd /var/www/myci.local php spark |
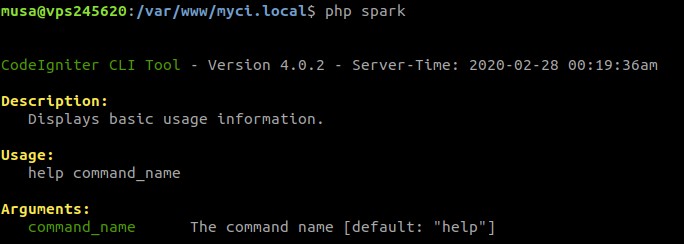
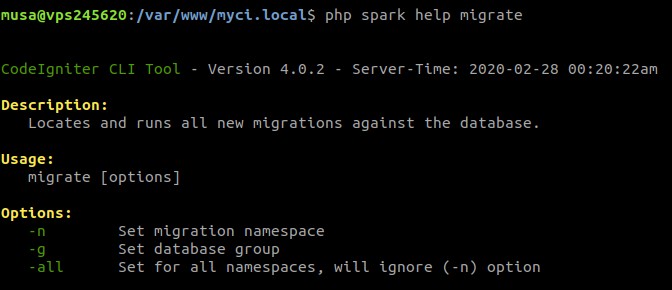
Menampilkan help dari command
1 | php spark migrate help |
Selamat mencoba 🙂
Hi, I follow your yt video, I need to make a production site in ci4 using aws lightsail but in some part the CI send me to another web.
Do you have some updates about this video?
I don’t have the latest update for this video. check the source code, maybe there is a redirect code to another website.
Ini kan via local host ya pak, agar bisa kita akses dengan nama domain yang kita beli gimana ya konfig nya?
arahkan domain ke IP server dengan membuat A record di DNS. di sisi server buat virtual host untuk domainnya, tinggal ubah
ServerName mycli.localmenjadiServerName domainanda.com.document root nya gak usah di ubah pak? tetep pakai mycli.local? apa ikut di ubah sesuai nama domain.com >?
diubah juga, sesuaikan dengan folder yang kamu gunakan
sudah saya ikuti semua langkah2 nya pak, setting A record DNS sudah saya kerjakan, saya coba cek dns nya jg udah up. tp ketika saya akses dengan mengetikan nama domain dibrowser gak bisa konek. ada solusi pak? terima kasih
ada pesan error di browser? cek error log web server.
AH00112: Warning: DocumentRoot [/var/www/ci4.id/public] does not exist
ikutin tutorial lain juga gini terus kang, kira kira knp ya
direktori itu tidak ada