Cara Install Let’s Encrypt SSL (HTTPS) dengan Nginx di CentOS 7
Pada tutorial sebelumnya saya sudah membahas tentang Let’s Encrypt SSL dan cara install dengan Apache di CentOS 7. Tutorial kali ini masih tentang Let’s Encrypt SSL tapi menggunakan Nginx sebagai web server.
0. Perangkat yang Digunakan
Perangkat yang digunakan pada tutorial ini:
1. Install Let’s Encrypt untuk Nginx
Diasumsikan virtualhost untuk domain linus.cf sudah aktif dan dapat diakses dengan baik.

Install EPEL repository
1 | # yum install epel-release |
Install certbot untuk Nginx
1 | # yum install python-certbot-nginx |
2. Meminta Sertifikat SSL dari Let’s Encrypt
Selanjutnya meminta sertifikat SSL untuk domain linus.cf.
1 | # certbot --nginx -d linus.cf -d www.linus.cf |
Masukkan alamat email untuk notifikasi sertifikat SSL yang akan habis masa berlakunya.
1 2 | Enter email address (used for urgent renewal and security notices) (Enter 'c' to cancel): hai@musaamin.web.id |
Setujui ToS
1 2 3 4 5 6 | Please read the Terms of Service at https://letsencrypt.org/documents/LE-SA-v1.2-November-15-2017.pdf. You must agree in order to register with the ACME server at https://acme-v02.api.letsencrypt.org/directory - - - - - - - - - - - - - - - - - - - - - - - - - - - - - - - - - - - - - - - - (A)gree/(C)ancel: A |
Jawab Y untuk mendapatkan informasi mengenai proyek Let’s Encrypt.
1 2 3 4 5 6 | Would you be willing to share your email address with the Electronic Frontier Foundation, a founding partner of the Let's Encrypt project and the non-profit organization that develops Certbot? We'd like to send you email about our work encrypting the web, EFF news, campaigns, and ways to support digital freedom. - - - - - - - - - - - - - - - - - - - - - - - - - - - - - - - - - - - - - - - - (Y)es/(N)o: N |
Sertifikat SSL mulai dibuat
1 2 3 4 5 | Obtaining a new certificate Performing the following challenges: http-01 challenge for linus.cf http-01 challenge for www.linus.cf Waiting for verification... |
Memasang sertifikat SSL pada konfigurasi server block Nginx
1 2 | Deploying Certificate to VirtualHost /etc/nginx/sites-enabled/linus.cf.conf Deploying Certificate to VirtualHost /etc/nginx/sites-enabled/linus.cf.conf |
Jawab 2, semua permintaan HTTP dialihkan ke HTTPS. certbot akan mengubah konfigurasi VirtualHost Nginx.
1 2 3 4 5 6 7 8 | Please choose whether or not to redirect HTTP traffic to HTTPS, removing HTTP access. - - - - - - - - - - - - - - - - - - - - - - - - - - - - - - - - - - - - - - - - 1: No redirect - Make no further changes to the webserver configuration. 2: Redirect - Make all requests redirect to secure HTTPS access. Choose this for new sites, or if you're confident your site works on HTTPS. You can undo this change by editing your web server's configuration. - - - - - - - - - - - - - - - - - - - - - - - - - - - - - - - - - - - - - - - - Select the appropriate number [1-2] then [enter] (press 'c' to cancel): 2 |
Sertifikat SSL sudah aktif dan dapat diuji menggunakan ssllabs.com.
1 2 3 4 5 6 | Congratulations! You have successfully enabled https://linus.cf and https://www.linus.cf You should test your configuration at: https://www.ssllabs.com/ssltest/analyze.html?d=linus.cf https://www.ssllabs.com/ssltest/analyze.html?d=www.linus.cf |
3. Memeriksa Konfigurasi VirtualHost Nginx
Memeriksa perubahan yang dilakukan oleh certbot terhadap file konfigurasi VirtualHost Nginx.
File server block linus.cf.conf, terdapat komentar # managed by Certbot yang merupakan konfigurasi yang ditambahkan oleh Certbot.
1 2 3 4 5 6 7 8 9 10 11 12 13 14 15 16 17 18 19 20 21 22 23 24 25 26 27 28 29 30 31 32 33 34 | server { server_name linus.cf www.linus.cf; root /var/www/html/linus.cf; index index.html index.htm; location / { try_files $uri $uri/ =404; } access_log /var/log/nginx/linus.cf.access.log; error_log /var/log/nginx/linus.cf.error.log; listen 443 ssl; # managed by Certbot ssl_certificate /etc/letsencrypt/live/linus.cf/fullchain.pem; # managed by Certbot ssl_certificate_key /etc/letsencrypt/live/linus.cf/privkey.pem; # managed by Certbot include /etc/letsencrypt/options-ssl-nginx.conf; # managed by Certbot ssl_dhparam /etc/letsencrypt/ssl-dhparams.pem; # managed by Certbot } server { if ($host = www.linus.cf) { return 301 https://$host$request_uri; } # managed by Certbot if ($host = linus.cf) { return 301 https://$host$request_uri; } # managed by Certbot listen 80; server_name linus.cf www.linus.cf; return 404; # managed by Certbot } |
4. Pengujian SSL / HTTPS
Selanjutnya menguji apakah SSL sudah terpasang dengan baik.
a. Cara Pertama: Mengakses domain melalui web browser
Domain harus dapat diakses menggunakan HTTPS dan harus secara otomatis dialihkan dari HTTP ke HTTPS.

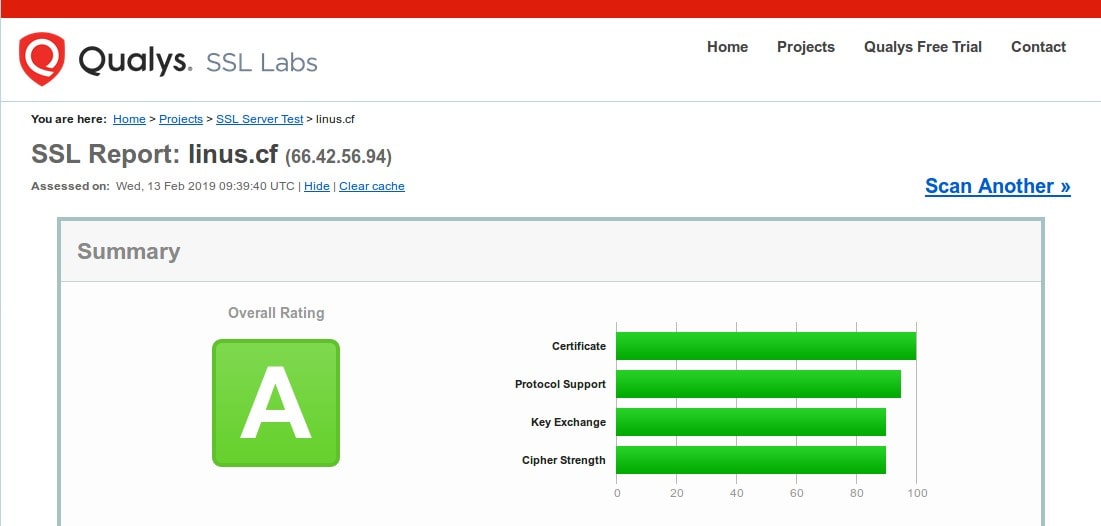
b. Cara Kedua: Menguji Rating Sertifikat SSL
Pengujian dilakukan menggunakan layanan dari SSLLabs.com.

5. Memperbarui Sertifikat SSL Secara Otomatis
Sertifikat SSL dari Let’s Encrypt hanya berlaku selama 90 hari dan harus diperbarui secara berkala. Kita dapat menggunakan crontab atau cronjob untuk menjalankan perintah memperbarui sertifikat SSL secara otomatis.
Masuk modifikasi crontab
1 | # crontab -e |
Buat penjadwalan untuk certbot. Menjalankan perintah memperbarui sertifikat SSL setiap hari pada jam 01.00.
1 | 00 1 * * * /usr/bin/certbot renew --quiet |
Selamat mencoba 🙂