How to Install Nextcloud with Nginx on Ubuntu 24.04
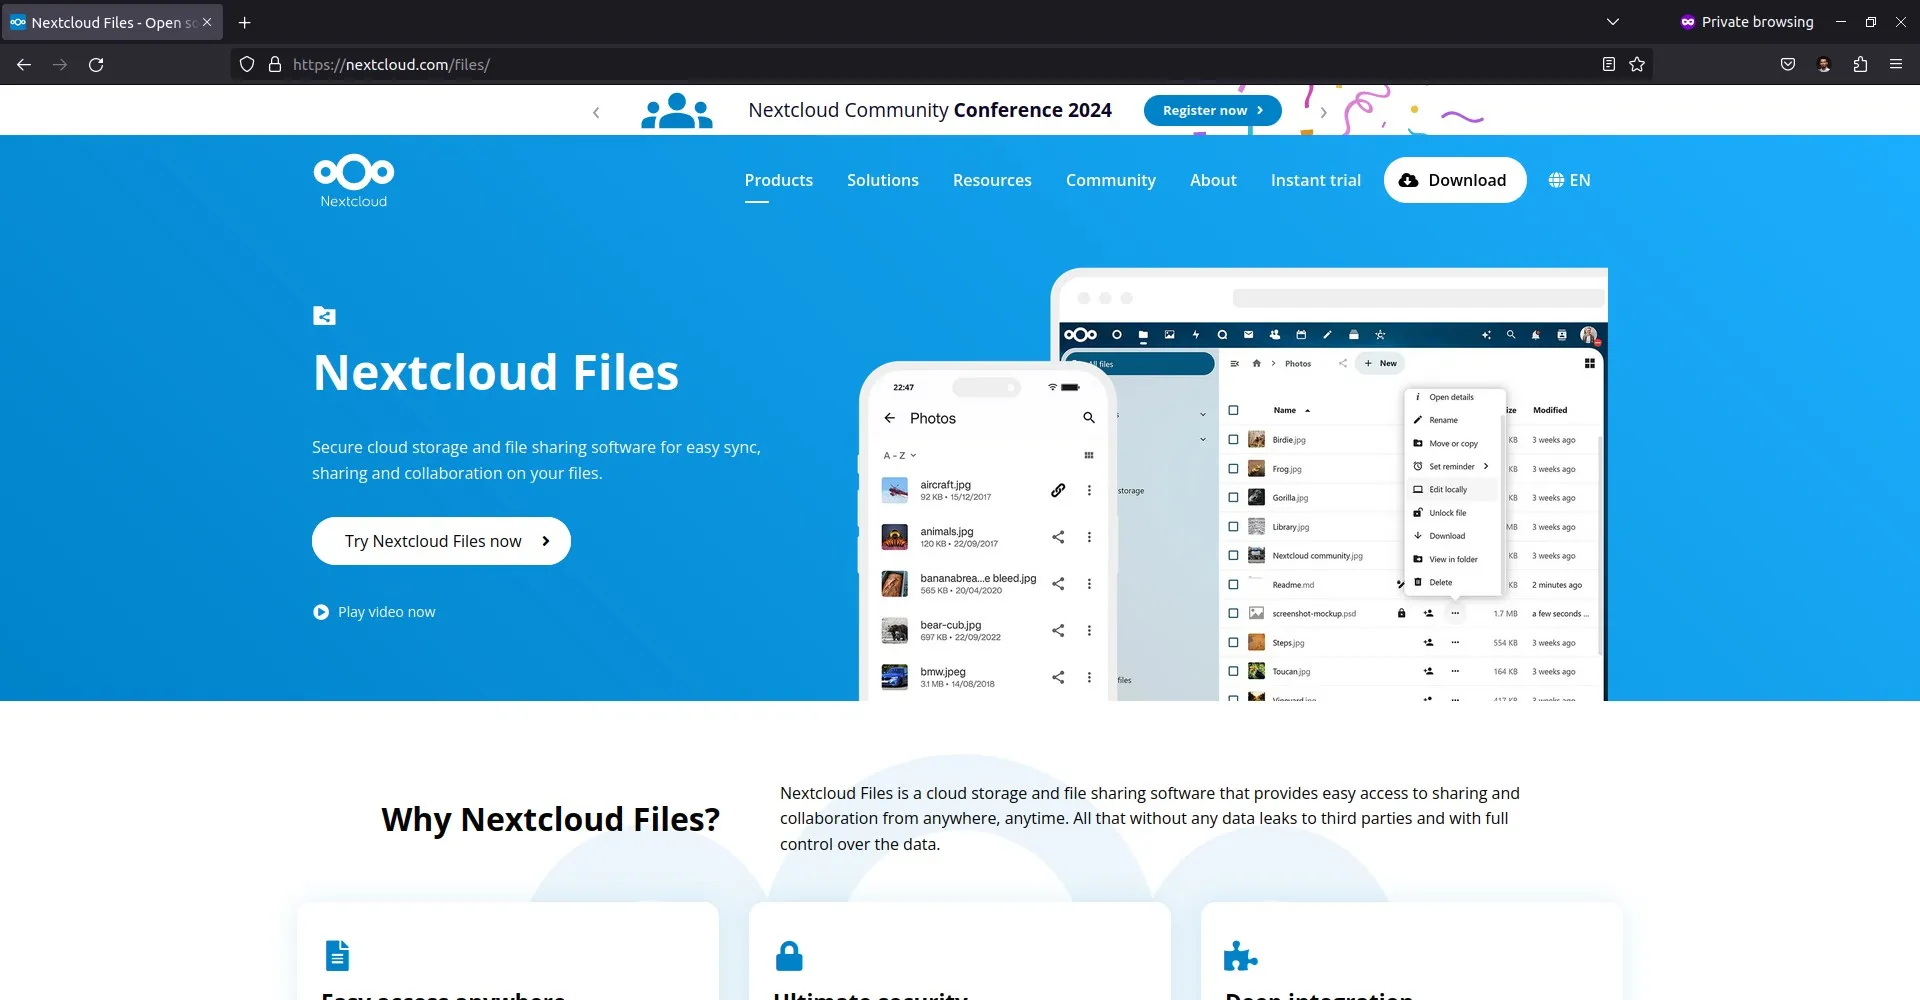
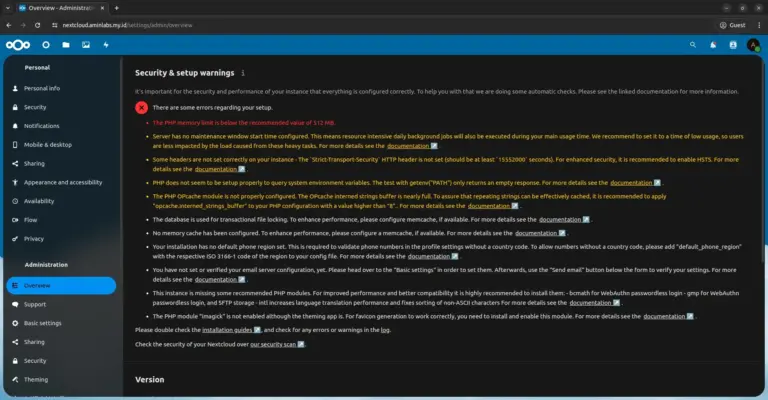
Cloud storage has become a crucial need for many people. Services like Dropbox and Google Drive offer the convenience of accessing files from anywhere, but privacy and data control are often major concerns. Nextcloud provides an open-source solution that allows us to build our own cloud storage, giving us full control over our data and ensuring privacy. Additionally, Nextcloud offers various extra features through apps that can be installed as needed. In this tutorial, we will learn how to install Nextcloud with Nginx on Ubuntu 24.04.
Tutorial Environment
In this tutorial, we will use:
- VPS: Vultr 1 CPU 1 GB RAM
- OS: Ubuntu 24.04
- Web server: Nginx
- PHP: PHP v8.3
- Database: MariaDB v10.11
- Subdomain: nextcloud.aminlabs.my.id
- SSL: Let’s Encrypt
- Nextcloud: Nextcloud v29
Notes:
- For Nextcloud system requirements, refer to docs.nextcloud.com
- Sign up here to get $100 free credit from Vultr.
Install Nextcloud
The steps to install Nextcloud are divided into 6 stages: installing the MariaDB database, installing PHP, installing Nginx, installing SSL, and installing Nextcloud.
1. Install MariaDB
Update and upgrade the Ubuntu system:
1 2 | sudo apt update sudo apt upgrade -y |
Install the MariaDB database:
1 | sudo apt install mariadb-server -y |
Log in to MariaDB:
1 | sudo mariadb -u root |
Create a database for Nextcloud:
1 2 3 4 5 | CREATE DATABASE nextcloud; CREATE USER 'nextcloud'@'localhost' IDENTIFIED BY 'rahasia'; GRANT ALL PRIVILEGES ON nextcloud.* TO 'nextcloud'@'localhost'; FLUSH PRIVILEGES; exit |
2. Install PHP
Install PHP and the extensions required by Nextcloud:
1 | sudo apt install php8.3 php8.3-common php8.3-cli php8.3-fpm php8.3-gd php8.3-xml php8.3-mbstring php8.3-mysql php8.3-curl php8.3-zip zlib1g-dev -y |
Open the php.ini configuration file:
1 | sudo nano /etc/php/8.3/fpm/php.ini |
Change the memory_limit value to 512M:
1 | memory_limit = 512M |
Restart the PHP-FPM server:
1 | sudo systemctl restart php8.3-fpm |
3. Install Nginx
Install the Nginx web server:
1 | sudo apt install nginx -y |
Create an Nginx server block configuration file for the subdomain nextcloud.aminlabs.my.id:
1 | sudo nano /etc/nginx/sites-available/nextcloud.aminlabs.my.id.conf |
Add the configuration:
1 2 3 4 | server { listen 80; server_name nextcloud.aminlabs.my.id; } |
Enable the Nginx server block configuration:
1 | sudo ln -s /etc/nginx/sites-available/nextcloud.aminlabs.my.id.conf /etc/nginx/sites-enabled |
Restart the Nginx service:
1 | sudo systemctl restart nginx |
Open ports 80 and 443 if UFW firewall is active:
1 2 | sudo ufw allow 80 sudo ufw allow 443 |
4. Install SSL
Install Certbot for Nginx:
1 | sudo apt install certbot python3-certbot-nginx -y |
Request SSL for the subdomain nextcloud.aminlabs.my.id:
1 2 3 4 5 6 7 | sudo certbot --non-interactive \ -m admin@aminlabs.my.id \ --agree-tos \ --no-eff-email \ --nginx \ -d nextcloud.aminlabs.my.id \ --redirect |
5. Configure Nginx for Nextcloud
Open the previously created Nginx server block configuration file:
1 | sudo nano /etc/nginx/sites-available/nextcloud.aminlabs.my.id.conf |
Modify the configuration content for reverse proxy to PHP-FPM and specific configurations for Nextcloud:
1 2 3 4 5 6 7 8 9 10 11 12 13 14 15 16 17 18 19 20 21 22 23 24 25 26 27 28 29 30 31 32 33 34 35 36 37 38 39 40 41 42 43 44 45 46 47 48 49 50 51 52 53 54 55 56 57 58 59 60 61 62 63 64 65 66 67 68 69 70 71 72 73 74 75 76 77 78 79 80 81 82 83 84 85 86 87 88 89 90 91 92 93 94 95 96 97 98 99 100 101 102 103 104 105 106 107 108 109 110 111 112 113 114 115 116 117 118 119 120 121 122 123 124 125 126 127 128 129 130 131 132 133 134 135 136 137 138 | upstream php-handler { server unix:/run/php/php8.3-fpm.sock; } map $arg_v $asset_immutable { "" ""; default ", immutable"; } server { listen 80; listen [::]:80; server_name nextcloud.aminlabs.my.id; server_tokens off; return 301 https://$server_name$request_uri; } server { listen 443 ssl http2; listen [::]:443 ssl http2; server_name nextcloud.aminlabs.my.id; server_tokens off; root /var/www/nextcloud.aminlabs.my.id/nextcloud; ssl_certificate /etc/letsencrypt/live/nextcloud.aminlabs.my.id/fullchain.pem; ssl_certificate_key /etc/letsencrypt/live/nextcloud.aminlabs.my.id/privkey.pem; include /etc/letsencrypt/options-ssl-nginx.conf; ssl_dhparam /etc/letsencrypt/ssl-dhparams.pem; client_max_body_size 512M; client_body_timeout 300s; client_body_buffer_size 512k; fastcgi_buffers 64 4K; fastcgi_hide_header X-Powered-By; gzip on; gzip_vary on; gzip_comp_level 4; gzip_min_length 256; gzip_proxied expired no-cache no-store private no_last_modified no_etag auth; gzip_types application/atom+xml text/javascript application/javascript application/json application/ld+json application/manifest+json application/rss+xml application/vnd.geo+json application/vnd.ms-fontobject application/wasm application/x-font-ttf application/x-web-app-manifest+json application/xhtml+xml application/xml font/opentype image/bmp image/svg+xml image/x-icon text/cache-manifest text/css text/plain text/vcard text/vnd.rim.location.xloc text/vtt text/x-component text/x-cross-domain-policy; add_header Referrer-Policy "no-referrer" always; add_header X-Content-Type-Options "nosniff" always; add_header X-Frame-Options "SAMEORIGIN" always; add_header X-Permitted-Cross-Domain-Policies "none" always; add_header X-Robots-Tag "noindex, nofollow" always; add_header X-XSS-Protection "1; mode=block" always; include mime.types; types { text/javascript mjs; } index index.php /index.php$request_uri; location = / { if ( $http_user_agent ~ ^DavClnt ) { return 302 /remote.php/webdav/$is_args$args; } } location = /robots.txt { allow all; log_not_found off; access_log off; } location ^~ /.well-known { location = /.well-known/carddav { return 301 /remote.php/dav/; } location = /.well-known/caldav { return 301 /remote.php/dav/; } location /.well-known/acme-challenge { try_files $uri $uri/ =404; } location /.well-known/pki-validation { try_files $uri $uri/ =404; } return 301 /index.php$request_uri; } location ~ ^/(?:build|tests|config|lib|3rdparty|templates|data)(?:$|/) { return 404; } location ~ ^/(?:\.|autotest|occ|issue|indie|db_|console) { return 404; } location ~ \.php(?:$|/) { rewrite ^/(?!index|remote|public|cron|core\/ajax\/update|status|ocs\/v[12]|updater\/.+|ocs-provider\/.+|.+\/richdocumentscode(_arm64)?\/proxy) /index.php$request_uri; fastcgi_split_path_info ^(.+?\.php)(/.*)$; set $path_info $fastcgi_path_info; try_files $fastcgi_script_name =404; include fastcgi_params; fastcgi_param SCRIPT_FILENAME $document_root$fastcgi_script_name; fastcgi_param PATH_INFO $path_info; fastcgi_param HTTPS on; fastcgi_param modHeadersAvailable true; fastcgi_param front_controller_active true; fastcgi_pass php-handler; fastcgi_intercept_errors on; fastcgi_request_buffering off; fastcgi_max_temp_file_size 0; } location ~ \.(?:css|js|mjs|svg|gif|png|jpg|ico|wasm|tflite|map|ogg|flac)$ { try_files $uri /index.php$request_uri; add_header Cache-Control "public, max-age=15778463$asset_immutable"; add_header Referrer-Policy "no-referrer" always; add_header X-Content-Type-Options "nosniff" always; add_header X-Frame-Options "SAMEORIGIN" always; add_header X-Permitted-Cross-Domain-Policies "none" always; add_header X-Robots-Tag "noindex, nofollow" always; add_header X-XSS-Protection "1; mode=block" always; access_log off; } location ~ \.woff2?$ { try_files $uri /index.php$request_uri; expires 7d; access_log off; } location /remote { return 301 /remote.php$request_uri; } location / { try_files $uri $uri/ /index.php$request_uri; } access_log /var/log/nginx/nextcloud.aminlabs.my.id_access.log; error_log /var/log/nginx/nextcloud.aminlabs.my.id_error.log; } |
For a complete explanation of the above configuration, refer to docs.nextcloud.com.
Restart the Nginx service:
1 | sudo systemctl restart nginx |
6. Nextcloud Web Installer
Download the latest Nextcloud web installer:
1 | wget https://download.nextcloud.com/server/releases/latest.zip -O nextcloud.zip |
Install unzip if not already available:
1 | sudo apt install unzip -y |
Extract nextcloud.zip to the document root directory, as configured in Nginx:
1 | sudo unzip nextcloud.zip -d /var/www/nextcloud.aminlabs.my.id |
Create a nextcloud-data directory for storing Nextcloud data:
1 | sudo mkdir /var/www/nextcloud.aminlabs.my.id/nextcloud-data |
Change the ownership of the directory to the www-data user:
1 | sudo chown -R www-data:www-data /var/www/nextcloud.aminlabs.my.id |
Browse to https://nextcloud.aminlabs.my.id. If all previous configurations are correct, you should see the page as shown in the image below:
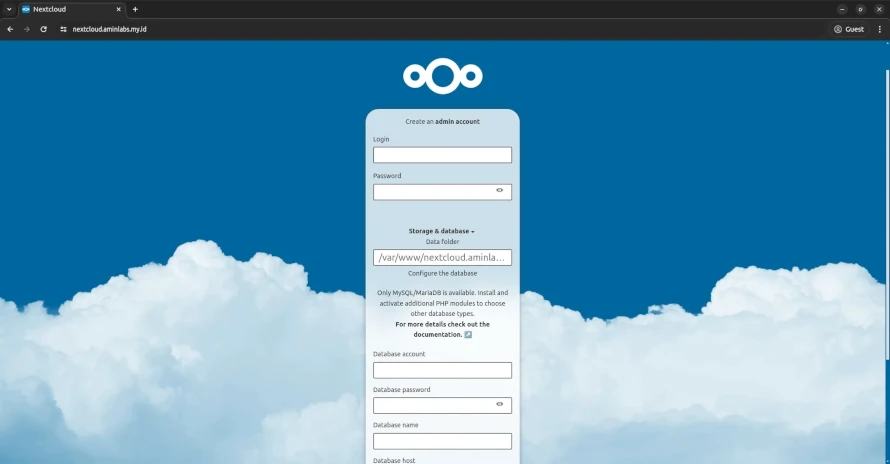
Enter the required information:
- Login: Username for the Nextcloud admin account
- Password: Password for the Nextcloud admin account
- Data folder: Data directory location, /var/www/nextcloud.aminlabs.my.id/nextcloud-data
- Database account: Database username, nextcloud
- Database password: Database password, rahasia
- Database name: Database name, nextcloud
Then click the Install button.
If the installation is completed successfully, you should see a result like the image below:
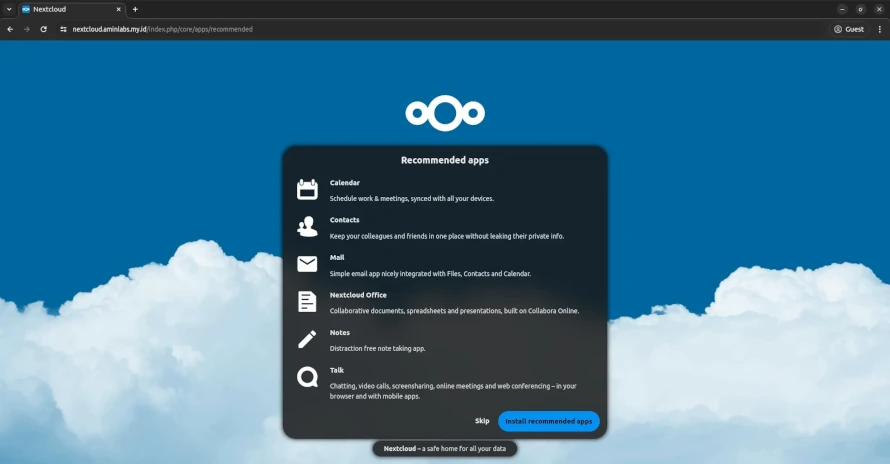
Click Skip to be redirected to the Dashboard.
At this point, the installation steps for Nextcloud are complete. For administration and usage instructions for Nextcloud, please follow the official guide:
If you found this article helpful and would like to support my work, consider making a donation through PayPal. Your support helps me continue creating useful content and tutorials. Thank you!
Donate via PayPal: https://paypal.me/musaamin
