How to Deploy Django 3 on Ubuntu 18.04

Previously I had discussed about how to install Django 3 on Ubuntu 18.04 and run it using a development server. I am now discussing how to deploy Django 3 on Ubuntu 18.04 and run it using a Nginx HTTP server combined with a Gunicorn WSGI server.
0.System requirements
The software needed is:
- Ubuntu Server 18.04 LTS (IP 216.158.228.175)
- Django app
- Nginx (HTTP server)
- Gunicorn (WSGI server)
- Domain (django.getbox.xyz)

HTTP requests from clients (web browsers) will be served by Nginx, if the requested request is a Django script (Python) then Nginx sends the request (reverse proxy) to Gunicorn (Green Unicorn – WSGI server). Then from Gunicorn accessing Django, then the results (response) are sent back from Django-> Gunicorn-> Nginx-> Web Browser.
1.Install Django app
Setting up the Django app for demo, if you already have the Django app, skip this step, proceed to the Gunicorn installation.
Install pip, virtualenv, and django.
1 2 3 4 5 6 7 8 9 | sudo apt install python3-pip -y sudo su pip3 install virtualenv exit cd; mkdir mydjango; cd mydjango virtualenv env source env/bin/activate pip install Django==3.0 django-admin startproject myproject . |
Project configuration.
1 | vi myproject/settings.py |
Ubah opsi ALLOWED_HOSTS dan tambahkan opsi STATIC_ROOT.
1 2 | ALLOWED_HOSTS = ['django.getbox.xyz', '127.0.0.1'] STATIC_ROOT = os.path.join(BASE_DIR, 'static/') |
Run collectstatic to collect all static files (images, css, js).
1 | python manage.py collectstatic |
The result
1 | 130 static files copied to '/home/musaamin/mydjango/static'. |
Try running it with a development server.
1 | python manage.py runserver |
The result
1 2 3 4 5 6 7 8 9 10 11 | Performing system checks... System check identified no issues (0 silenced). You have 17 unapplied migration(s). Your project may not work properly until you apply the migrations for app(s): admin, auth, contenttypes, sessions. Run 'python manage.py migrate' to apply them. January 18, 2020 - 23:44:34 Django version 3.0, using settings 'myproject.settings' Starting development server at http://127.0.0.1:8000/ Quit the server with CONTROL-C. |
Press CTRL + C to stop the development server.
2.Install Gunicorn
Install gunicorn via pip.
1 | pip install gunicorn |
Run Django with Gunicorn.
1 | gunicorn --bind 127.0.0.1:8000 myproject.wsgi |
The result
1 2 3 4 | [2020-01-18 23:48:07 +0000] [18863] [INFO] Starting gunicorn 20.0.4 [2020-01-18 23:48:07 +0000] [18863] [INFO] Listening at: http://127.0.0.1:8000 (18863) [2020-01-18 23:48:07 +0000] [18863] [INFO] Using worker: sync [2020-01-18 23:48:07 +0000] [18866] [INFO] Booting worker with pid: 18866 |
Press CTRL + C to stop the gunicorn.
Exit the virtual environment.
1 | deactivate |
Create Gunicorn service
Create Gunicorn service so that Gunicorn doesn’t need to be run manually, keep running in the background (daemon), and by default it is active at boot (autostart).
Creating a service configuration file.
1 | sudo vi /etc/systemd/system/mydjango.service |
Fill in the file with the code below.
1 2 3 4 5 6 7 8 9 10 11 12 13 14 15 16 | [Unit] Description=Gunicorn mydjango After=network.target [Service] User=musaamin Group=www-data WorkingDirectory=/home/musaamin/mydjango ExecStart=/home/musaamin/mydjango/env/bin/gunicorn \ --access-logfile log/gunicorn/mydjango.access.log \ --error-logfile log/gunicorn/mydjango.error.log \ --workers 3 \ --bind unix:/home/musaamin/mydjango/mydjango.sock myproject.wsgi:application [Install] WantedBy=multi-user.target |
Create log directory.
1 | mkdir -p ~/mydjango/log/gunicorn |
Run the service and check the status.
1 2 3 | sudo systemctl start mydjango sudo systemctl enable mydjango sudo systemctl status mydjango |
The result.
1 2 3 4 5 6 7 8 9 10 11 12 | mydjango.service - Gunicorn mydjango Loaded: loaded (/etc/systemd/system/mydjango.service; disabled; vendor preset: enabled) Active: active (running) since Mon 2020-01-20 02:11:23 UTC; 53s ago Main PID: 10965 (gunicorn) Tasks: 4 (limit: 4915) CGroup: /system.slice/mydjango.service ├─10965 /home/musaamin/mydjango/env/bin/python3 /home/musaamin/mydjango/env/bin/gunicorn --access-logfile log/gunicorn/mydjango.access.log --error-logfile log/gunicorn/mydjango.error.log --workers 3 --bind unix:/home/musaamin/mydjango/mydjango.sock myproject.wsgi:application ├─10968 /home/musaamin/mydjango/env/bin/python3 /home/musaamin/mydjango/env/bin/gunicorn --access-logfile log/gunicorn/mydjango.access.log --error-logfile log/gunicorn/mydjango.error.log --workers 3 --bind unix:/home/musaamin/mydjango/mydjango.sock myproject.wsgi:application ├─10969 /home/musaamin/mydjango/env/bin/python3 /home/musaamin/mydjango/env/bin/gunicorn --access-logfile log/gunicorn/mydjango.access.log --error-logfile log/gunicorn/mydjango.error.log --workers 3 --bind unix:/home/musaamin/mydjango/mydjango.sock myproject.wsgi:application └─10970 /home/musaamin/mydjango/env/bin/python3 /home/musaamin/mydjango/env/bin/gunicorn --access-logfile log/gunicorn/mydjango.access.log --error-logfile log/gunicorn/mydjango.error.log --workers 3 --bind unix:/home/musaamin/mydjango/mydjango.sock myproject.wsgi:application Jan 20 02:11:23 intrsrv01.getbox.xyz systemd[1]: Started Gunicorn mydjango. |
3.Install Nginx
Install Nginx web server.
1 | sudo apt install nginx |
Create a server block for django.getbox.xyz.
1 | sudo vi /etc/nginx/conf.d/django.getbox.xyz.conf |
Fill in the file with the code below.
1 2 3 4 5 6 7 8 9 10 11 12 13 14 15 16 17 | server { listen 80; server_name django.getbox.xyz; location = /favicon.ico { access_log off; log_not_found off; } location /static/ { root /home/musaamin/mydjango; } location / { include proxy_params; proxy_pass http://unix:/home/musaamin/mydjango/mydjango.sock; } access_log /var/log/nginx/django.getbox.xyz.access.log; error_log /var/log/nginx/django.getbox.xyz.error.log warn; } |
Test Nginx configuration.
1 | sudo nginx -t |
The message is displayed if there are no errors in the Nginx configuration.
1 2 | nginx: the configuration file /etc/nginx/nginx.conf syntax is ok nginx: configuration file /etc/nginx/nginx.conf test is successful |
Restart Nginx.
1 2 | sudo systemctl restart nginx sudo systemctl status nginx |
4.Test
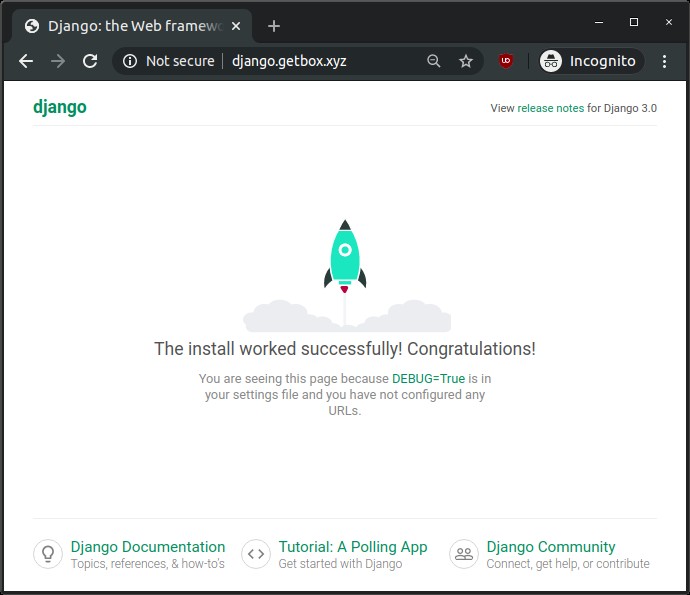
Browse the Django application domain.

If you found this article helpful and would like to support my work, consider making a donation through PayPal. Your support helps me continue creating useful content and tutorials. Thank you!
Donate via PayPal: https://paypal.me/musaamin

