Cara Install Apache, MariaDB, PHP (LAMP) di openSUSE Leap 15.1
Tutorial ini membahas bagaimana cara install Apache web server, MariaDB database, PHP, dan phpMyAdmin.
0.Update System dan Package
Sebelum install LAMP sebaiknya update openSUSE Leap terlebih dahulu.
1 2 | sudo zypper refresh sudo zypper update |
1.Install Apache Web Server
Install Apache web server dengan nama paket apache2.
1 | sudo zypper install apache2 |
Aktifkan Apache saat boot dan jalankan.
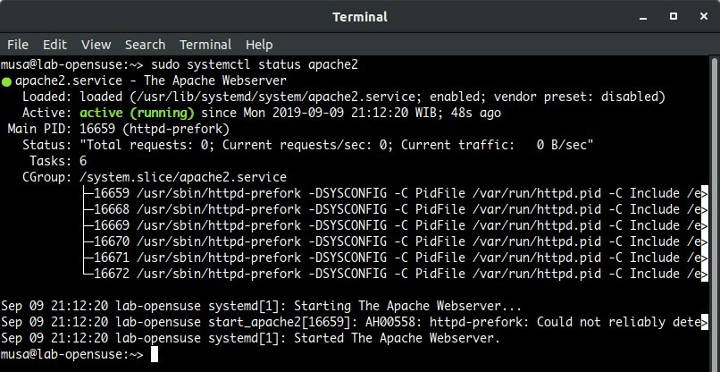
1 2 3 | sudo systemctl enable apache2 sudo systemctl start apache2 sudo systemctl status apache2 |
Cek versi Apache.
1 2 3 4 | sudo httpd -v Server version: Apache/2.4.33 (Linux/SUSE) Server built: 2019-08-28 06:00:22.000000000 +0000 |
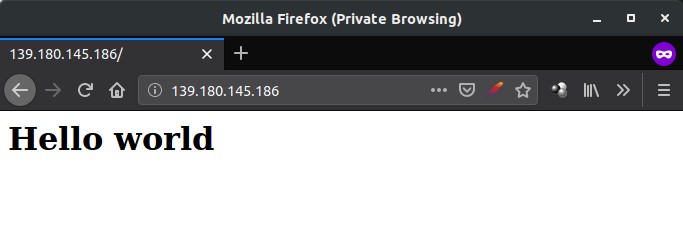
Buat file index.html di dalam document root.
1 | sudo nano /srv/www/htdocs/index.html |
Isi file index.html.
1 2 3 4 5 | <html> <body> <h1> Hello world</h1> </body> </html> |
Browsing http://localhost kalau di pc sendiri atau http://ip-server kalau server di jaringan.
Ubah kepemilikan direktori document root ke user Apache (wwwrun).
1 | sudo chown -R wwwrun /srv/www/htdocs |
3.Apache Virtual Host
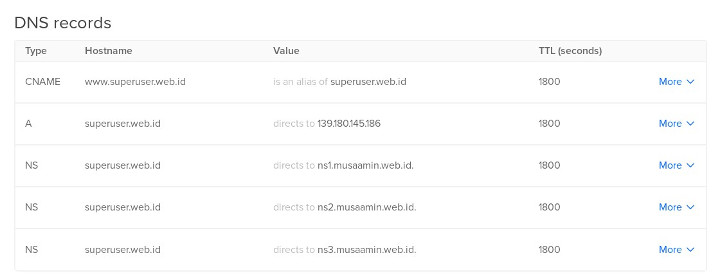
Membuat virtual host, di sini saya menggunakan domain superuser.web.id.
Buat A record di DNS records untuk mengarahkan domain ke IP server.
Lalu buat file virtual host.
1 2 | cd /etc/apache2/vhosts.d sudo nano superuser.web.id.conf |
Isi dari file superuser.web.id.conf.
1 2 3 4 5 6 7 8 9 10 11 12 | <VirtualHost *:80> ServerName www.superuser.web.id ServerAlias superuser.web.id DocumentRoot /srv/www/superuser.web.id <Directory /srv/www/superuser.web.id> Options Indexes FollowSymLinks MultiViews AllowOverride All Require all granted </Directory> ErrorLog /var/log/apache2/superuser.web.id.error.log CustomLog /var/log/apache2/superuser.web.id.access.log combined </VirtualHost> |
Buat direktori document root untuk superuser.web.id.
1 2 | cd /srv/www sudo mkdir superuser.web.id |
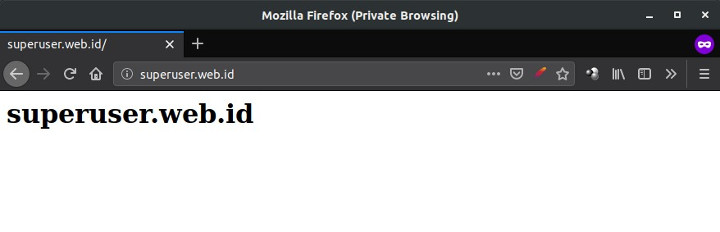
Buat file index.html.
1 | sudo nano superuser.web.id/index.html |
Isi dari file index.html.
1 2 3 4 5 | <html> <body> <h1>superuser.web.id</h1> </body> </html> |
Restart Apache.
1 | sudo systemctl restart apache2 |
Browsing domain http://superuser.web.id.
4.Install MariaDB Database
Install MariaDB server beserta clientnya.
1 | sudo zypper install mariadb mariadb-client mariadb-tools |
Aktifkan MariaDB saat boot dan jalankan.
1 2 3 | sudo systemctl enable mysql sudo systemctl start mysql sudo systemctl status mysql |
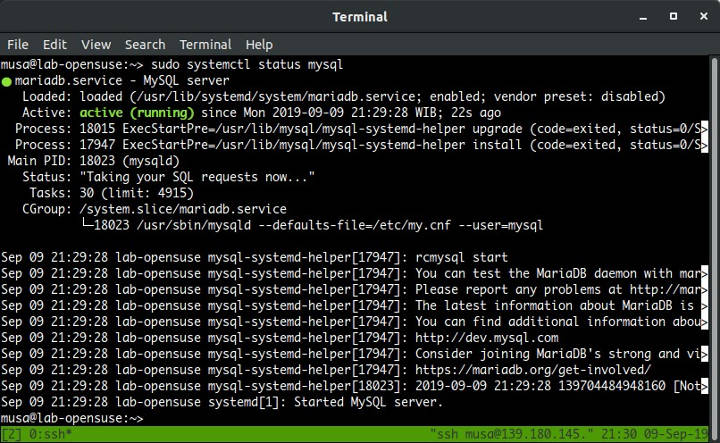
Cek versi MariaDB.
1 2 3 | mysql --version mysql Ver 15.1 Distrib 10.2.25-MariaDB, for Linux (x86_64) using EditLine wrapper |
Lakukan pengamanan instalasi MariaDB.
1 2 3 4 5 6 7 8 | sudo mysql_secure_installation Enter current password for root (enter for none): ENTER Set root password? [Y/n] y Remove anonymous users? [Y/n] y Disallow root login remotely? [Y/n] y Remove test database and access to it? [Y/n] y Reload privilege tables now? [Y/n] y |
Login MariaDB menggunakan aplikasi mysql-client.
1 | mysql -u root -p |
5.Install PHP
Install PHP dan extensionnya.
1 | sudo zypper install php7 php7-mysql apache2-mod_php7 |
Aktifkan module PHP7 untuk Apache.
1 2 | sudo a2enmod php7 sudo systemctl restart apache2 |
Cek versi PHP.
1 2 3 4 5 | php -v PHP 7.2.5 (cli) ( NTS ) Copyright (c) 1997-2018 The PHP Group Zend Engine v3.2.0, Copyright (c) 1998-2018 Zend Technologies |
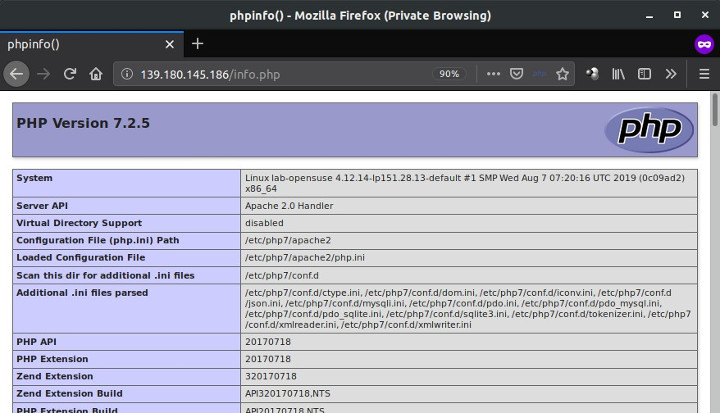
Buat file info.php untuk menguji apakah PHP sudah terinstall dengan baik.
1 | sudo nano /srv/www/htdocs/info.php |
Isi dari file info.php.
1 | <?php phpinfo(); ?> |
Lalu browsing http://localhost/info.php atau http://ip-server/info.php.
6.Install phpMyAdmin
Selanjutnya install phpMyAdmin, aplikasi manajemen database MariaDB/MySQL.
1 | sudo zypper install phpMyAdmin |
Restart Apache karena ada PHP extension tambahan yang baru diinstall untuk kebutuhan phpMyAdmin.
1 | sudo systemctl restart apache2 |
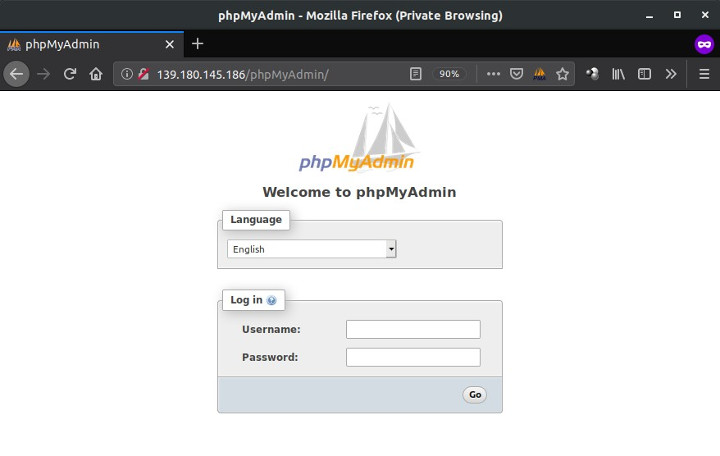
Browsing http://localhost/phpMyAdmin atau http://ip-server/phpMyAdmin.
Selamat mencoba 🙂

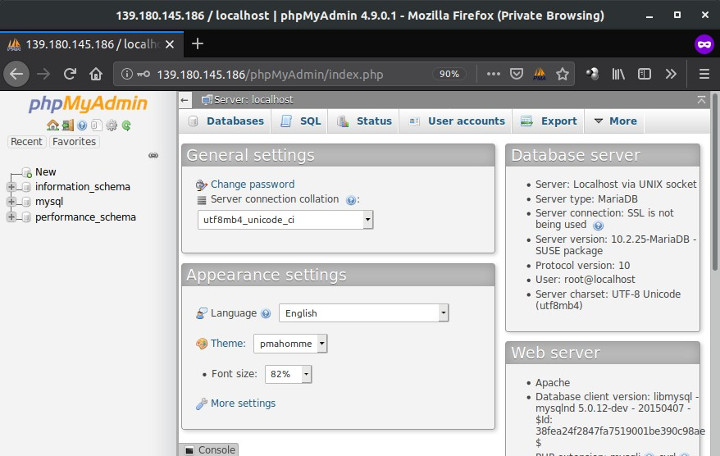
cara login ke phpmyadmin gimana?
Login di http://ip-server/phpMyAdmin