How to Install VPSSIM Control Panel
VPSSIM (VPS SIMPLE) is a command line-based hosting control panel application, specifically for the installation and optimization of Nginx, PHP, and MariaDB on the CentOS Linux distribution. Unlike other control panels written in the PHP programming language that runs in a web browser, VPSSIM is accessed via SSH and does not run in the background (daemons, services) so that it does not use resources (CPU, RAM) when not in use.
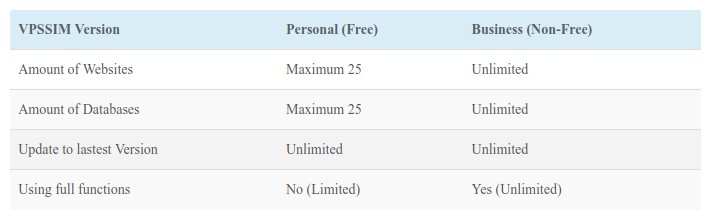
VPSSIM is available in 2 versions, the first is the Personal version which can be obtained free of charge with limited features. The second, Business Version with prices starting at $ 6, 1 code register for 1 VPS, using 1 time code.
0.Install VPSSIM
Prepare CentOS 7 which is still fresh
Download the VPSSIM installer script then run it
1 | curl http://get.vpssim.com -o vpssim && sh vpssim |
Then a menu is displayed, enter 1 for Setup VPSSIM Now
1 2 3 4 5 6 7 8 9 10 11 12 | ========================================================================= CHOOSE SETUP VPSSIM NOW OR CHECK THIS VPS. ------------------------------------------------------------------------- Check VPS function: VPSSIM will check: VPS info (location, server type, ------------------------------------------------------------------------- CPU type, RAM, HDD speed...), SpeedTest ... ------------------------------------------------------------------------- You also can use this check VPS function after setup VPSSIM. ========================================================================= 1) Setup VPSSIM Now 2) Check This VPS Type in your choice: 1 |

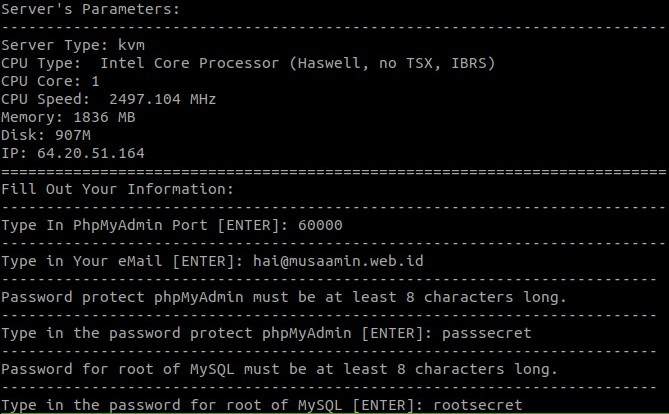
Enter the port number for phpMyAdmin, for example 60000
Enter email address
Enter the password for phpMyAdmin protection
Enter the root password for MySQL
1 2 3 4 5 6 7 8 9 10 11 12 13 14 15 16 17 18 19 20 21 22 23 24 25 26 27 28 29 30 31 32 33 | ========================================================================== Default VPSSIM setup PHP 7.1 for server. Change PHP version by using the -------------------------------------------------------------------------- function: [Change PHP Version] in [Update System (Nginx,PHP...)] on VPSSIM -------------------------------------------------------------------------- PHP versions support: 7.3, 7.2, 7.1, 7.0, 5.6, 5.5 & 5.4 -------------------------------------------------------------------------- MariaDB versions support: 10.3, 10.2, 10.1 & 10.0 ========================================================================== Server's Parameters: -------------------------------------------------------------------------- Server Type: kvm CPU Type: Intel Core Processor (Haswell, no TSX, IBRS) CPU Core: 1 CPU Speed: 2497.104 MHz Memory: 1836 MB Disk: 907M IP: 64.20.51.164 ========================================================================== Fill Out Your Information: -------------------------------------------------------------------------- Type In PhpMyAdmin Port [ENTER]: 6000 -------------------------------------------------------------------------- Type in Your eMail [ENTER]: hai@musaamin.web.id -------------------------------------------------------------------------- Password protect phpMyAdmin must be at least 8 characters long -------------------------------------------------------------------------- Type in the password protect phpMyAdmin [ENTER]: passsecret -------------------------------------------------------------------------- Password for root of MySQL must be at least 8 characters long -------------------------------------------------------------------------- Type in the password for root of MySQL [ENTER]: rootsecret -------------------------------------------------------------------------- |
Select the version of MariaDB, MariaDB 10.3
1 2 3 4 5 6 7 | Choose MariaDB Version ========================================================================== 1) MariaDB 10.3 2) MariaDB 10.2 3) MariaDB 10.1 4) MariaDB 10.0 Type in your choice: 1 |

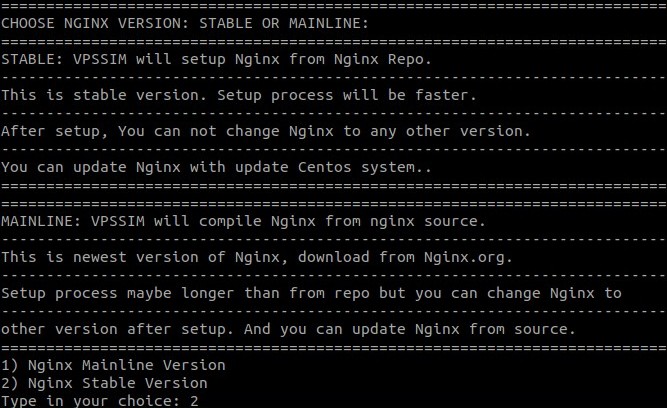
Select the Nginx version, Nginx Stable Version
1 2 3 4 5 6 7 8 9 10 11 12 13 14 15 16 17 18 19 20 21 22 23 | ========================================================================== CHOOSE NGINX VERSION: STABLE OR MAINLINE: ========================================================================== STABLE: VPSSIM will setup Nginx from Nginx Repo. -------------------------------------------------------------------------- This is stable version. Setup process will be faster. -------------------------------------------------------------------------- After setup, You can not change Nginx to any other version. -------------------------------------------------------------------------- You can update Nginx with update Centos system.. ========================================================================== ========================================================================== MAINLINE: VPSSIM will compile Nginx from nginx source. -------------------------------------------------------------------------- This is newest version of Nginx, download from Nginx.org. -------------------------------------------------------------------------- Setup process maybe longer than from repo but you can change Nginx to -------------------------------------------------------------------------- other version after setup. And you can update Nginx from source. ========================================================================== 1) Nginx Mainline Version 2) Nginx Stable Version Type in your choice: 2 |
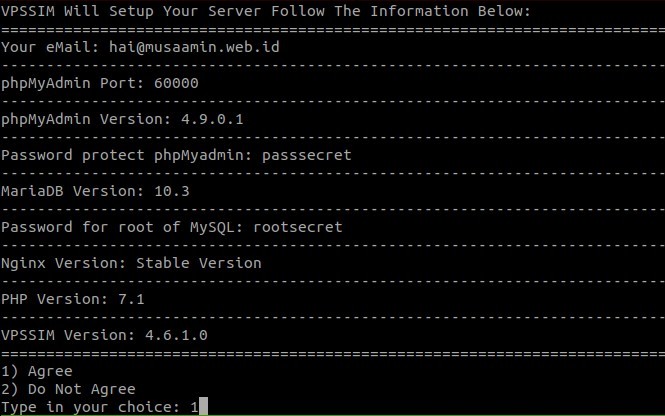
VPSSIM setup information, answer 1 to continue
1 2 3 4 5 6 7 8 9 10 11 12 13 14 15 16 17 18 19 20 21 22 23 | VPSSIM Will Setup Your Server Follow The Information Below: ========================================================================== Your eMail: hai@musaamin.web.id -------------------------------------------------------------------------- phpMyAdmin Port: 60000 -------------------------------------------------------------------------- phpMyAdmin Version: 4.9.0.1 -------------------------------------------------------------------------- Password protect phpMyadmin: passsecret -------------------------------------------------------------------------- MariaDB Version: 10.3 -------------------------------------------------------------------------- Password for root of MySQL: rootsecret -------------------------------------------------------------------------- Nginx Version: Stable Version -------------------------------------------------------------------------- PHP Version: 7.1 -------------------------------------------------------------------------- VPSSIM Version: 4.6.1.0 ========================================================================== 1) Agree 2) Do Not Agree Type in your choice: 1 |
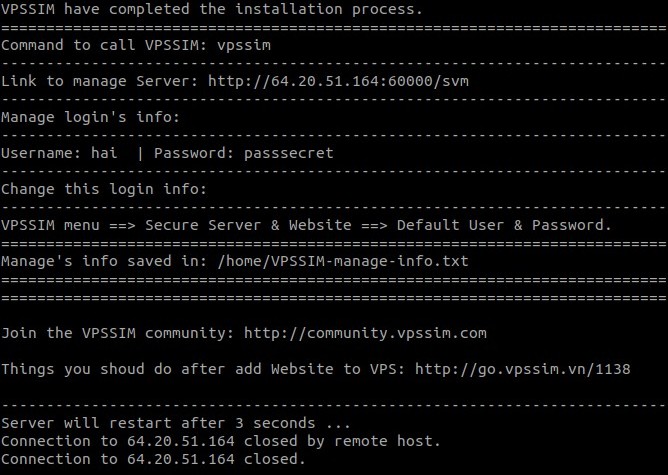
VPSSIM has finished installing
1 2 3 4 5 6 7 8 9 10 11 12 13 14 15 16 17 18 19 20 21 22 23 24 25 26 | VPSSIM have completed the installation process. ========================================================================== Command to call VPSSIM: vpssim -------------------------------------------------------------------------- Link to manage Server: http://64.20.51.164:60000/svm -------------------------------------------------------------------------- Manage login's info: -------------------------------------------------------------------------- Username: hai | Password: passsecret -------------------------------------------------------------------------- Change this login info: -------------------------------------------------------------------------- VPSSIM menu ==> Secure Server & Website ==> Default User & Password. ========================================================================== Manage's info saved in: /home/VPSSIM-manage-info.txt ========================================================================== ========================================================================== Join the VPSSIM community: http://community.vpssim.com Things you shoud do after add Website to VPS: http://go.vpssim.vn/1138 -------------------------------------------------------------------------- Server will restart after 3 seconds ... Connection to 64.20.51.164 closed by remote host. Connection to 64.20.51.164 closed. |
1.Add Website and Install WordPress
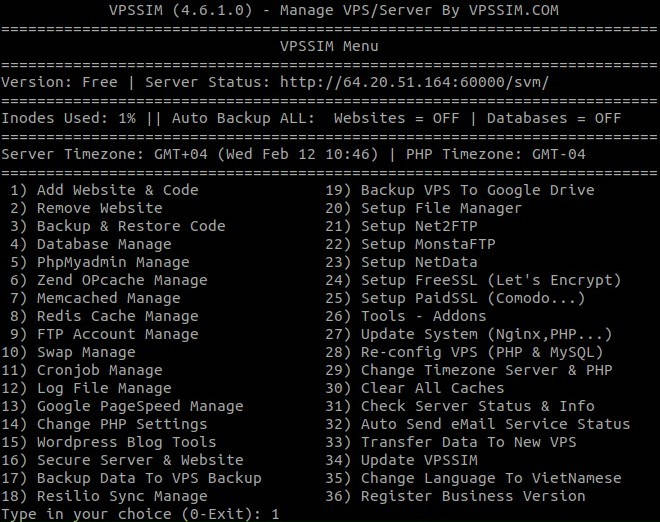
Login to the server via SSH, then run the vpssim command to open the VPSSIM Menu.
Enter the number 1 for Add Website & Code
1 2 3 4 5 6 7 8 9 10 11 12 13 14 15 16 17 18 19 20 21 22 23 24 25 26 27 28 29 | VPSSIM (4.6.1.0) - Manage VPS/Server By VPSSIM.COM ========================================================================= VPSSIM Menu ========================================================================= Version: Free | Server Status: http://64.20.51.164:60000/svm/ ========================================================================= Inodes Used: 1% || Auto Backup ALL: Websites = OFF | Databases = OFF ========================================================================= Server Timezone: GMT+04 (Wed Feb 12 10:46) | PHP Timezone: GMT-04 ========================================================================= 1) Add Website & Code 19) Backup VPS To Google Drive 2) Remove Website 20) Setup File Manager 3) Backup & Restore Code 21) Setup Net2FTP 4) Database Manage 22) Setup MonstaFTP 5) PhpMyadmin Manage 23) Setup NetData 6) Zend OPcache Manage 24) Setup FreeSSL (Let's Encrypt) 7) Memcached Manage 25) Setup PaidSSL (Comodo...) 8) Redis Cache Manage 26) Tools - Addons 9) FTP Account Manage 27) Update System (Nginx,PHP...) 10) Swap Manage 28) Re-config VPS (PHP & MySQL) 11) Cronjob Manage 29) Change Timezone Server & PHP 12) Log File Manage 30) Clear All Caches 13) Google PageSpeed Manage 31) Check Server Status & Info 14) Change PHP Settings 32) Auto Send eMail Service Status 15) Wordpress Blog Tools 33) Transfer Data To New VPS 16) Secure Server & Website 34) Update VPSSIM 17) Backup Data To VPS Backup 35) Change Language To VietNamese 18) Resilio Sync Manage 36) Register Business Version Type in your choice (0-Exit): 1 |
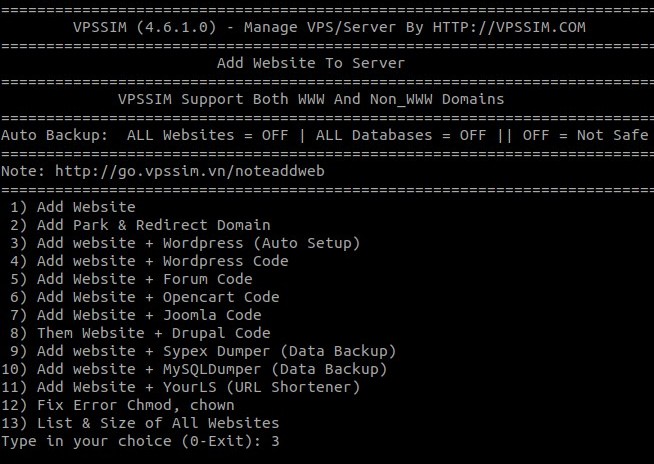
Add a website and install CMS, 3) Add website + WordPress (Auto Setup)
1 2 3 4 5 6 7 8 9 10 11 12 13 14 15 16 17 18 19 20 21 22 23 24 25 | ========================================================================= VPSSIM (4.6.1.0) - Manage VPS/Server By HTTP://VPSSIM.COM ========================================================================= Add Website To Server ========================================================================= VPSSIM Support Both WWW And Non_WWW Domains ========================================================================= Auto Backup: ALL Websites = OFF | ALL Databases = OFF || OFF = Not Safe ========================================================================= Note: http://go.vpssim.vn/noteaddweb ========================================================================= 1) Add Website 2) Add Park & Redirect Domain 3) Add website + Wordpress (Auto Setup) 4) Add website + Wordpress Code 5) Add Website + Forum Code 6) Add Website + Opencart Code 7) Add Website + Joomla Code 8) Them Website + Drupal Code 9) Add website + Sypex Dumper (Data Backup) 10) Add website + MySQLDumper (Data Backup) 11) Add Website + YourLS (URL Shortener) 12) Fix Error Chmod, chown 13) List & Size of All Websites Type in your choice (0-Exit): 3 |
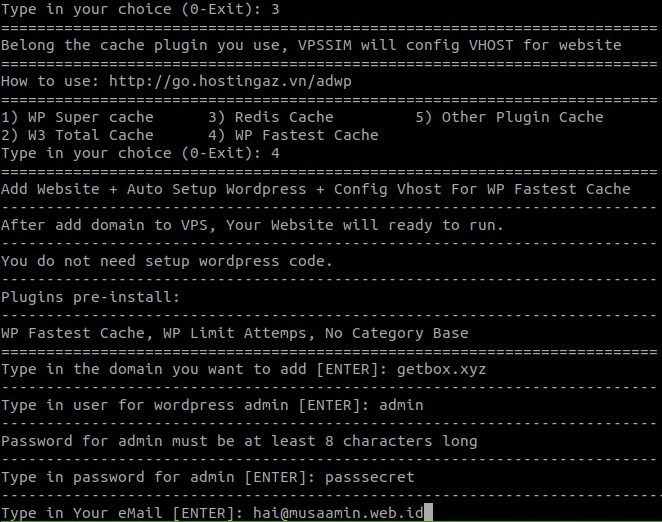
Select the cache plugin you want to use, for example 4) WP Fastest Cache
Then enter the domain name, for example getbox.xyz
Enter the username for the admin
Enter the password for the admin
Enter email address
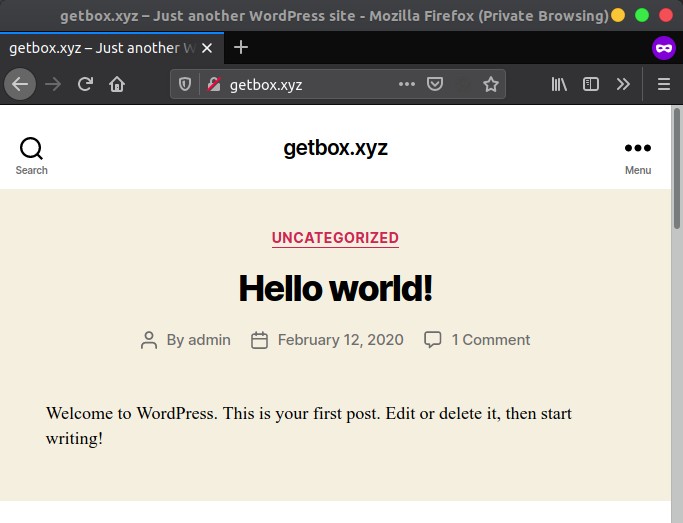
The WordPress website is up and running
2.Install SSL
Run vpssim and enter 24 for 24) FreeSSL (Let’s Encrypt) Setup
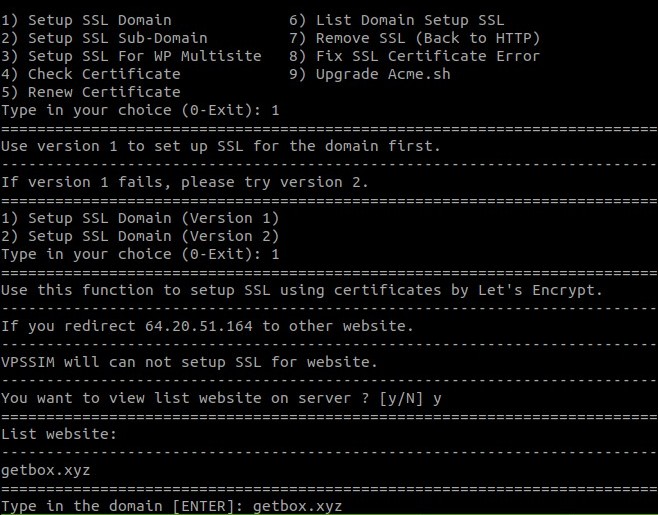
Enter 1) Setup SSL Domain
1 2 3 4 5 6 7 8 9 10 11 12 13 14 15 16 17 18 19 20 21 22 23 24 | ========================================================================= VPSSIM (4.6.1.0) - Manage VPS/Server By HTTP://VPSSIM.COM ========================================================================= Setup SSL - Let's Encrypt ========================================================================= Powered by Acme.Sh | Version: 2.8.6 ========================================================================= VPSSIM Auto Renew All SSL Certificates 30 Days Before Expired ========================================================================= How to use: http://go.vpssim.vn/ssltools ========================================================================= Let's Encrypt Rate Limits per week: Certificates per Registered Domain ------------------------------------------------------------------------- is 50 (include sud-domain). Duplicate Certificate limit of 5 certificates ------------------------------------------------------------------------- If you break the rules, that domain will be block 7 days in setup SSL. ========================================================================= 1) Setup SSL Domain 6) List Domain Setup SSL 2) Setup SSL Sub-Domain 7) Remove SSL (Back to HTTP) 3) Setup SSL For WP Multisite 8) Fix SSL Certificate Error 4) Check Certificate 9) Upgrade Acme.sh 5) Renew Certificate Type in your choice (0-Exit): 1 |
Enter 1) Setup SSL Domain (Version 1)
You want to view list website on server ? [y/N] y
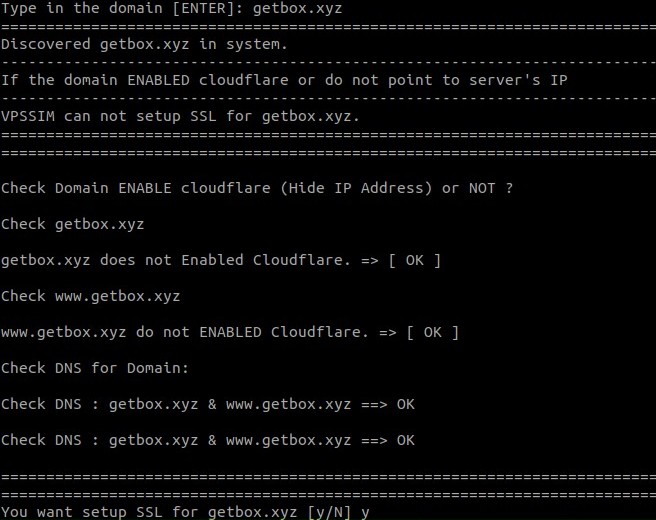
Enter domain name
You want setup SSL for getbox.xyz [y/N] y
1 2 3 4 5 6 7 8 9 10 11 12 13 14 15 16 17 18 19 | Check Domain ENABLE cloudflare (Hide IP Address) or NOT ? Check getbox.xyz getbox.xyz does not Enabled Cloudflare. => [ OK ] Check www.getbox.xyz www.getbox.xyz do not ENABLED Cloudflare. => [ OK ] Check DNS for Domain: Check DNS : getbox.xyz & www.getbox.xyz ==> OK Check DNS : getbox.xyz & www.getbox.xyz ==> OK ========================================================================= ========================================================================= You want setup SSL for getbox.xyz [y/N] y |
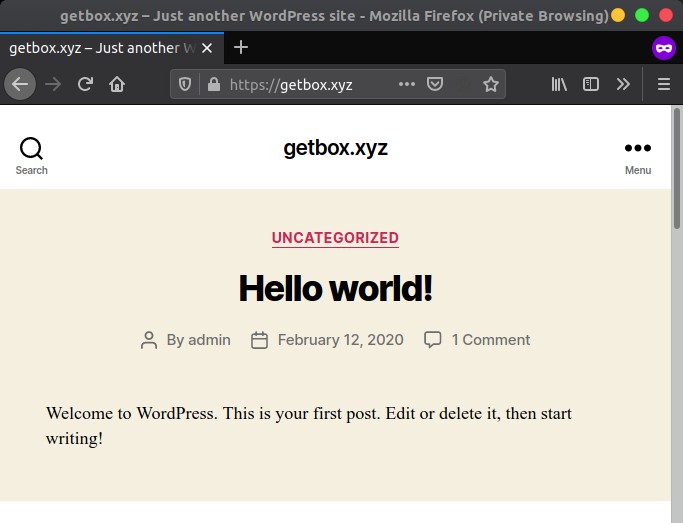
The website is already running on HTTPS
3.Change PHP Version
Jalankan vpssim, enter 27) Update System (Nginx,PHP…)
Enter 5) Change PHP Version
1 2 3 4 5 6 7 8 9 | ========================================================================= VPSSIM (4.6.1.0) - Manage VPS/Server By HTTP://VPSSIM.COM ========================================================================= Update / Upgrade Service ========================================================================= 1) Update System 4) Change MariaDB Version 2) Update Nginx 5) Change PHP Version 3) Change phpMyAdmin Version Type in your choice (0-Exit):5 |
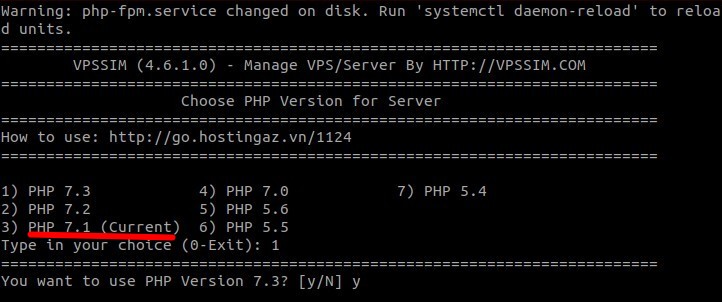
For example, if you want to change to PHP 7.3, enter 1) PHP 7.3 and answer y
1 2 3 4 5 6 7 8 9 10 11 12 13 14 | ========================================================================= VPSSIM (4.6.1.0) - Manage VPS/Server By HTTP://VPSSIM.COM ========================================================================= Choose PHP Version for Server ========================================================================= How to use: http://go.hostingaz.vn/1124 ========================================================================= 1) PHP 7.3 4) PHP 7.0 7) PHP 5.4 2) PHP 7.2 5) PHP 5.6 3) PHP 7.1 (Current) 6) PHP 5.5 Type in your choice (0-Exit): 1 ========================================================================= You want to use PHP Version 7.3? [y/N] y |
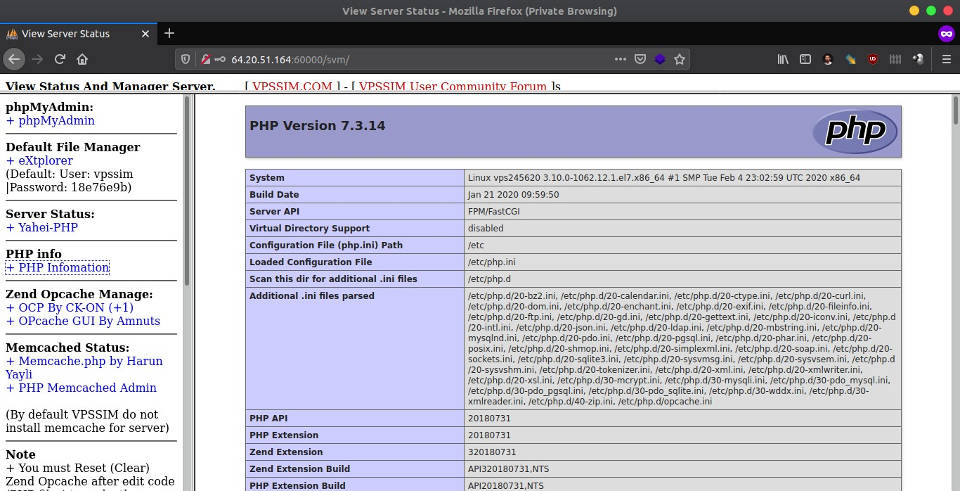
PHP version has changed
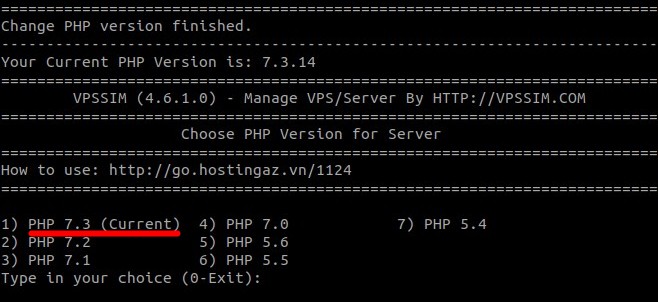
1 2 3 4 5 | [root@vps245620 ~]# php -v PHP 7.3.14 (cli) (built: Jan 21 2020 09:59:50) ( NTS ) Copyright (c) 1997-2018 The PHP Group Zend Engine v3.3.14, Copyright (c) 1998-2018 Zend Technologies with Zend OPcache v7.3.14, Copyright (c) 1999-2018, by Zend Technologies |

4.PHPInfo, phpMyAdmin, and File Manager
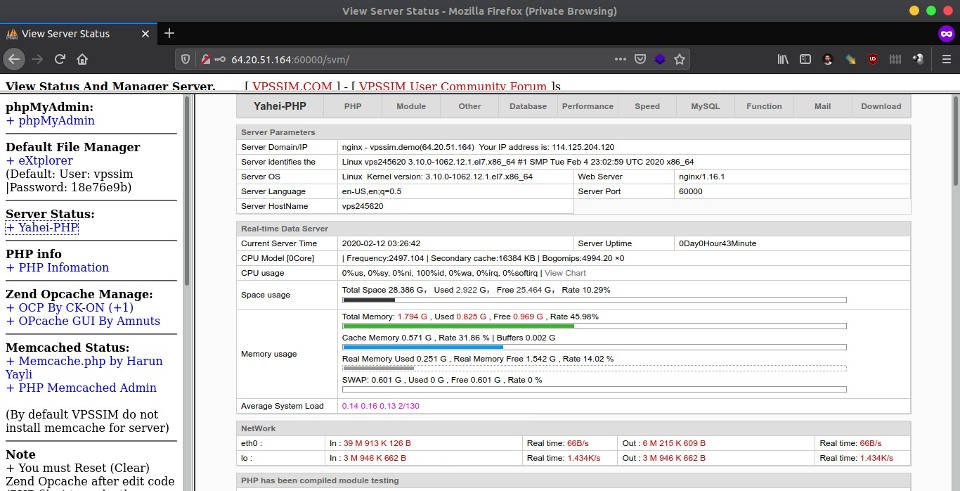
Login to the server manager url http://64.20.51.164:60000/svm
Enter username and password

- phpMyAdmin link to access phpMyAdmin or directly access the url http: //64.20.51.164: 60000
- eXtplorer link to access file manager or directly access the url http://64.20.51.164:60000/vsupload
- Yahei-PHP link to display server status
- PHP Information link to display PHP configuration information
If you found this article helpful and would like to support my work, consider making a donation through PayPal. Your support helps me continue creating useful content and tutorials. Thank you!
Donate via PayPal: https://paypal.me/musaamin