How to Install MinIO Object Storage on Ubuntu 24.04

Object storage is a data storage method where units of data are stored as separate objects. Unlike traditional file systems that use directory hierarchies or block storage systems that store data in fixed blocks, object storage keeps data in a single repository that can be directly accessed via a unique ID. Each object consists of the data itself, metadata, and a unique identifier. The main advantages of object storage include high scalability, the ability to store large amounts of unstructured data, and easier accessibility and management through application programming interfaces (APIs).
Object storage is ideal for storing large amounts of unstructured data, such as multimedia files (photos, videos), backups and archives, IoT sensor data, and web or mobile application data. Examples of object storage applications include storing backup files in cloud services, hosting media content, and storing large datasets for big data analysis or machine learning.
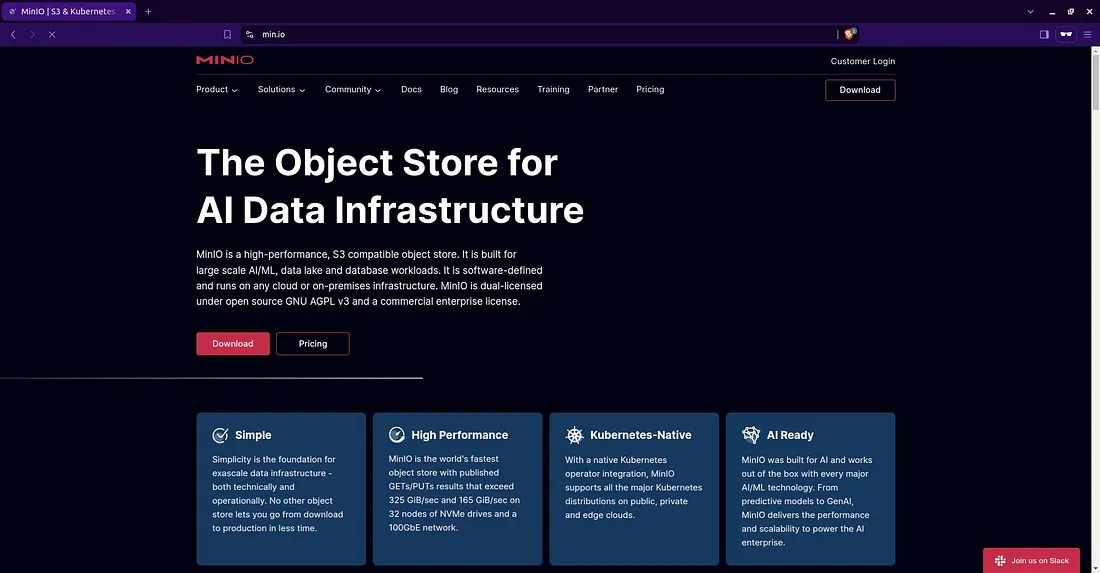
One popular implementation of Object Storage is MinIO. This open-source solution offers functionality similar to commercial cloud storage services like Amazon S3, but with greater control and flexibility. MinIO can be installed and run on various platforms, including Ubuntu. This tutorial will cover the step-by-step process of installing and configuring MinIO Object Storage on Ubuntu 24.04.
MinIO Deployment Topologies
There are three types of topologies in MinIO deployment:
- Single-Node Single-Drive (SNSD or “Standalone”): This is the simplest topology among all MinIO deployments. In this mode, MinIO is installed on a single node (server) and uses one drive (disk) to store data.
- Single-Node Multi-Drive (SNMD or “Standalone Multi-Drive”): In this topology, MinIO is installed on a single node but uses multiple drives (disks) to store data.
- Multi-Node Multi-Drive (MNMD or “Distributed”): This is the most complex topology among the three mentioned. In this mode, MinIO is installed on multiple nodes, and each node has multiple drives.
Tutorial Environment
In this tutorial, the following setup is used:
- VPS: Vultr, 1 CPU, 1 GB RAM
- Block Storage: 100GB
- Operating System: Ubuntu 24.04
- Subdomains: minio-console.aminlabs.my.id and minio-s3.aminlabs.my.id
- SSL: Cloudflare
- Topology: Single-Node Single-Drive
Note: Sign up here to get a $100 free credit from Vultr.
Steps to Install MinIO Server
The installation of the MinIO Server is divided into four parts: mount block storage, install MinIO server package, configure Nginx reverse proxy, and testing.
1. Mount Block Storage
Run the update and upgrade commands on Ubuntu:
1 2 | sudo apt update sudo apt upgrade -y |
For MinIO storage, a separate disk is prepared. In this tutorial, we use a Vultr cloud server and a 100GB block storage as an additional disk for MinIO.
Display block devices:
1 | sudo lsblk |
1 2 3 4 5 6 | NAME MAJ:MIN RM SIZE RO TYPE MOUNTPOINTS sr0 11:0 1 1024M 0 rom vda 253:0 0 32G 0 disk ├─vda1 253:1 0 512M 0 part /boot/efi └─vda2 253:2 0 31.5G 0 part / vdb 253:16 0 100G 0 disk |
In the output above, there is a device vdb that will be partitioned, formatted, and mounted.
Partition vdb, then format vdb1 with the XFS filesystem:
1 2 3 | sudo parted -s /dev/vdb mklabel gpt sudo parted -s /dev/vdb unit mib mkpart primary 0% 100% sudo mkfs.xfs /dev/vdb1 |
Verify the results of the above commands; vdb1 should be present:
1 | sudo lsblk |
1 2 3 4 5 6 7 | NAME MAJ:MIN RM SIZE RO TYPE MOUNTPOINTS sr0 11:0 1 1024M 0 rom vda 253:0 0 32G 0 disk ├─vda1 253:1 0 512M 0 part /boot/efi └─vda2 253:2 0 31.5G 0 part / vdb 253:16 0 100G 0 disk └─vdb1 253:17 0 100G 0 part |
Create a directory minio-storage to serve as the mount point for the vdb1 partition:
1 | sudo mkdir /mnt/minio-storage |
Mount vdb1 to /mnt/minio-storage:
1 | sudo mount /dev/vdb1 /mnt/minio-storage |
Verify the results of the above command:
1 | df -hT |
The result shows that vdb1 is successfully mounted at /mnt/minio-storage:
1 2 3 4 5 6 7 8 9 | Filesystem Type Size Used Avail Use% Mounted on tmpfs tmpfs 96M 1.2M 95M 2% /run efivarfs efivarfs 256K 18K 234K 7% /sys/firmware/efi/efivars /dev/vda2 ext4 30G 7.0G 22G 25% / tmpfs tmpfs 478M 0 478M 0% /dev/shm tmpfs tmpfs 5.0M 0 5.0M 0% /run/lock /dev/vda1 vfat 511M 6.2M 505M 2% /boot/efi tmpfs tmpfs 96M 12K 96M 1% /run/user/0 /dev/vdb1 xfs 100G 2.0G 98G 2% /mnt/minio-storage |
Open the fstab configuration file:
1 | sudo nano /etc/fstab |
Add a configuration line for auto-mounting vdb1:
1 | /dev/vdb1 /mnt/minio-storage xfs defaults 0 0 |
2. Install MinIO Server
Download and install MinIO Server:
1 2 | wget https://dl.min.io/server/minio/release/linux-amd64/minio_20240626010618.0.0_amd64.deb sudo dpkg -i minio_20240626010618.0.0_amd64.deb |
Check the latest version at min.io/download.
Create a minio-user and change the ownership of the minio-storage directory:
1 2 | sudo useradd -r minio-user -s /sbin/nologin sudo chown minio-user:minio-user /mnt/minio-storage |
Create the minio configuration file:
1 | sudo nano /etc/default/minio |
Add the following configuration:
1 2 3 4 | MINIO_VOLUMES="/mnt/minio-storage" MINIO_OPTS="--address :9000 --console-address :9001" MINIO_ROOT_USER=minioadmin MINIO_ROOT_PASSWORD=miniosecretpassword |
- MINIO_VOLUMES: lokasi penyimpanan data MinIO
- MINIO_OPTS:
--address :9000merupakan alamat dan port layanan MinIO akanlistening, sedangkan--console-address :9001untuk web console administrasi MinIO - MINIO_ROOT_USER: username untuk akun root MinIO
- MINIO_ROOT_PASSWORD: password untuk akun root MinIO
Open ports 9000 and 9001 if the UFW firewall is active:
1 2 | sudo ufw allow 9000 sudo ufw allow 9001 |
Start the MinIO service and display its status:
1 2 | sudo systemctl start minio sudo systemctl status minio |
3. Nginx Reverse Proxy
Install Nginx:
1 | sudo apt install nginx |
Location of the SSL certificate and private key files for the subdomain in use:
1 2 | /etc/ssl/minio/cert.pem /etc/ssl/minio/pvkey.pem |
Create an Nginx server block configuration file for the reverse proxy of the minio-console subdomain, which is the MinIO administration web interface:
1 | sudo nano /etc/nginx/conf.d/minio-console.conf |
Add the following configuration, adjusting the subdomain and port used:
1 2 3 4 5 6 7 8 9 10 11 12 13 14 15 16 17 18 19 20 21 22 23 24 25 26 27 28 29 30 31 32 33 34 35 36 37 38 39 40 41 42 43 44 45 46 47 | server { listen 443 ssl; listen [::]:443 ssl; server_name minio-console.aminlabs.my.id; ignore_invalid_headers off; client_max_body_size 0; proxy_buffering off; proxy_request_buffering off; location / { proxy_set_header Host $http_host; proxy_set_header X-Real-IP $remote_addr; proxy_set_header X-Forwarded-For $proxy_add_x_forwarded_for; proxy_set_header X-Forwarded-Proto $scheme; proxy_set_header X-NginX-Proxy true; real_ip_header X-Real-IP; proxy_connect_timeout 300; proxy_http_version 1.1; proxy_set_header Upgrade $http_upgrade; proxy_set_header Connection "upgrade"; chunked_transfer_encoding off; proxy_pass http://127.0.0.1:9001; } ssl_certificate /etc/ssl/minio/cert.pem; ssl_certificate_key /etc/ssl/minio/pvkey.pem; ssl_protocols TLSv1.2 TLSv1.3; ssl_ciphers HIGH:!aNULL:!MD5; ssl_prefer_server_ciphers on; access_log /var/log/nginx/minio-console.access.log; error_log /var/log/nginx/minio-console.error.log; } server { listen 80; listen [::]:80; server_name minio-console.aminlabs.my.id; return 301 https://$host$request_uri; } |
Create an Nginx server block configuration file for the reverse proxy of the minio-s3 subdomain, which provides API access:
1 | sudo nano /etc/nginx/conf.d/minio-s3.conf |
Add the following configuration, adjusting the subdomain and port used:
1 2 3 4 5 6 7 8 9 10 11 12 13 14 15 16 17 18 19 20 21 22 23 24 25 26 27 28 29 30 31 32 33 34 35 36 37 38 39 40 41 | listen 443 ssl; listen [::]:443 ssl; server_name minio-s3.aminlabs.my.id; ignore_invalid_headers off; client_max_body_size 0; proxy_buffering off; proxy_request_buffering off; location / { proxy_set_header Host $http_host; proxy_set_header X-Real-IP $remote_addr; proxy_set_header X-Forwarded-For $proxy_add_x_forwarded_for; proxy_set_header X-Forwarded-Proto $scheme; proxy_connect_timeout 300; proxy_http_version 1.1; proxy_set_header Connection ""; chunked_transfer_encoding off; proxy_pass http://127.0.0.1:9000; } ssl_certificate /etc/ssl/minio/cert.pem; ssl_certificate_key /etc/ssl/minio/pvkey.pem; ssl_protocols TLSv1.2 TLSv1.3; ssl_ciphers HIGH:!aNULL:!MD5; ssl_prefer_server_ciphers on; access_log /var/log/nginx/minio-s3.access.log; error_log /var/log/nginx/minio-s3.error.log; } server { listen 80; listen [::]:80; server_name minio-s3.aminlabs.my.id; return 301 https://$host$request_uri; } |
Restart and display the status of the MinIO service:
1 2 | sudo systemctl restart minio sudo systemctl status minio |
Open ports 80 and 443:
1 2 | sudo ufw allow 80 sudo ufw allow 443 |
4. Testing
Test the installation results by accessing the web console at https://minio-console.aminlabs.my.id, and log in using the root username and password configured earlier in the /etc/default/minio file. Try creating a bucket, uploading a file, and creating a user.
For the second test, access the MinIO API via a client application. Install the MinIO Client (mcli) DEB package:
1 2 | wget https://dl.min.io/client/mc/release/linux-amd64/mcli_20240629190846.0.0_amd64.deb sudo dpkg -i mcli_20240629190846.0.0_amd64.deb |
For the latest version and other operating systems, check min.io/download.
Connect to the MinIO server:
1 | mcli alias set myminio/ https://minio-s3.aminlabs.my.id MYUSER MYPASSWORD |
Display all objects in the myminio server and mydata bucket:
1 | mcli ls myminio/mydata |
For more detailed information and instructions, refer to the official MinIO documentation at min.io/docs.
If you found this article helpful and would like to support my work, consider making a donation through PayPal. Your support helps me continue creating useful content and tutorials. Thank you!
Donate via PayPal: https://paypal.me/musaamin


