How to Install Remote Desktop with X2Go on Ubuntu 20.04
X2Go is open source software that functions as a remote desktop server on Linux-based operating systems. The X2Go server is only available for Linux, but the X2Go client is available for Linux, Windows, macOS, and FreeBSD.
X2Go basic features
- Graphical Remote Desktop that works well over both low bandwidth and high bandwidth connections
- The ability to disconnect and reconnect to a session, even from another client
- Support for sound
- Support for as many simultaneous users as the computer’s resources will support (NX3 free edition limited you to 2.)
- Traffic is securely tunneled over SSH
- File Sharing from client to server
- Printer Sharing from client to server
- Easily select from multiple desktop environments (e.g., MATE, GNOME, KDE)
- Remote support possible via Desktop Sharing
- The ability to access single applications by specifying the name of the desired executable in the client configuration or selecting one of the pre-defined common applications
Install Desktop Environment
Install the desktop environment first on Ubuntu Server 20.04. The desktop environment used is XFCE.
Install xfce4 and all required dependency packages:
1 | apt install xubuntu-core |
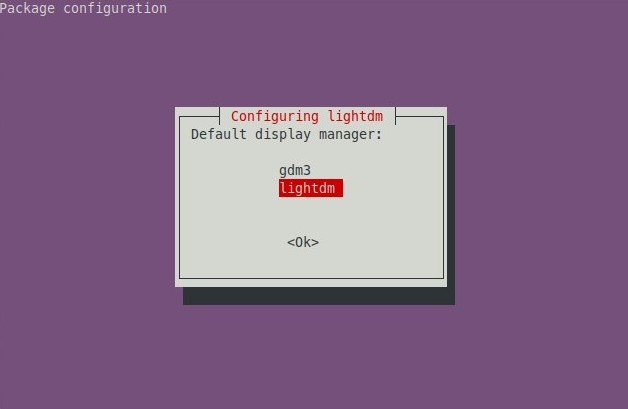
Select lightdm for the display manager:
Install X2Go Server
Install X2Go server on Ubuntu Server 20.04. X2Go is available in the default repositories Ubuntu 20.04, so there’s no need to add a repository anymore.
Install X2Go server:
1 | apt install x2goserver x2goserver-xsession |
Create User
Create a new user on the server because there are no other users besides the root user.
Create a new user with the name musaamin:
1 | adduser musaamin |
Enter user musaamin into group sudo to be able to run sudo commands.
1 | usermod -aG sudo musaamin |
Install X2Go Client
Install X2Go client on Ubuntu Desktop 20.04:
1 | sudo apt install x2goclient |
Connect to X2Go Server
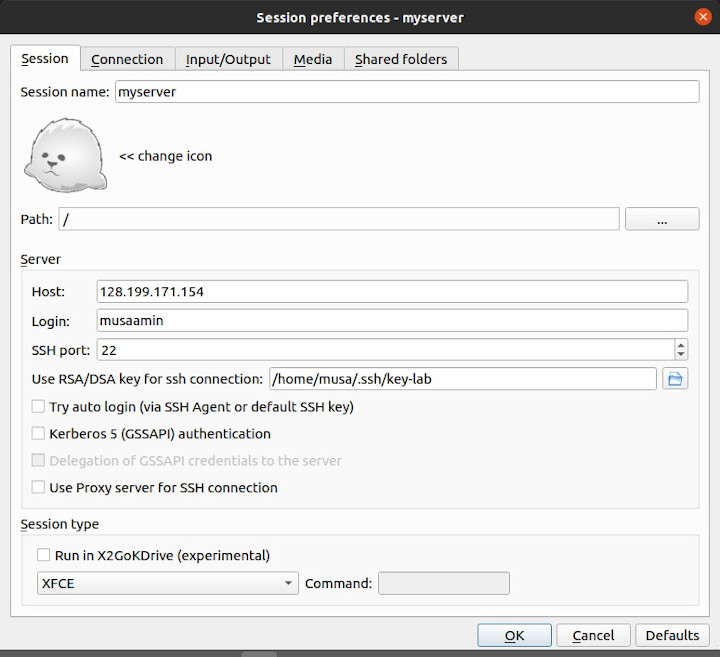
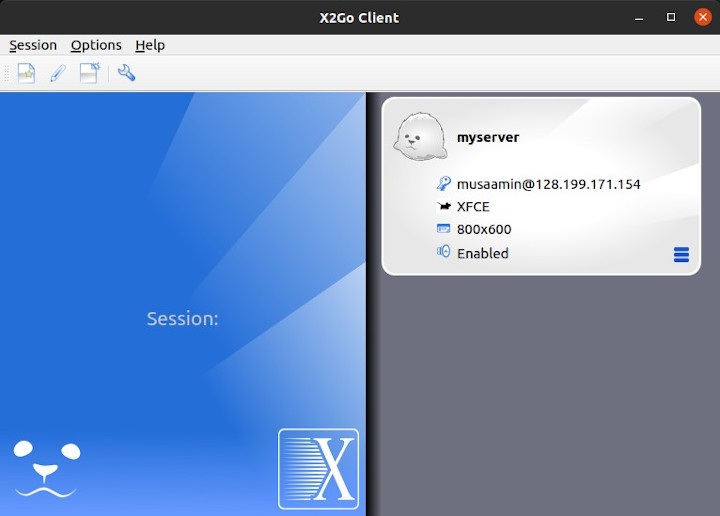
Run the X2Go client application, a window will open to create a session, or click the menu Session-> New session.
Enters:
- Session name
- Host, server IP address
- Login, username
- SSH port, SSH port number, default 22
- Use RSA/DSA key for ssh connection, private key file path if login using private key
- Session type, select XFCE
Then click OK.
Double click on the session name to connect to the server.
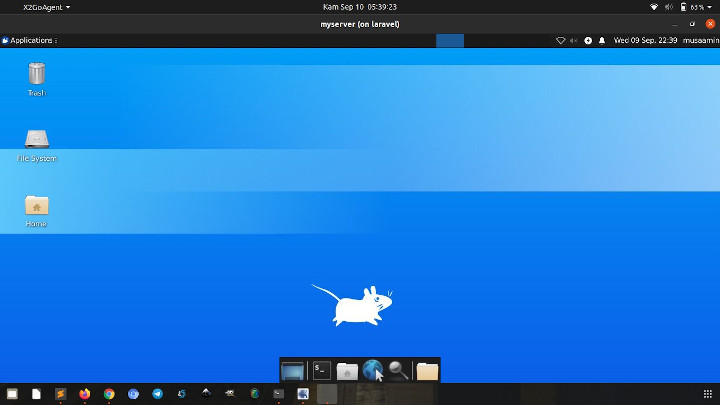
The X2Go client is successfully connected to the X2Go server.
If you found this article helpful and would like to support my work, consider making a donation through PayPal. Your support helps me continue creating useful content and tutorials. Thank you!
Donate via PayPal: https://paypal.me/musaamin