Cara Mudah Install WordPress di VPS DigitalOcean

DigitalOcean menyediakan Marketplace yang berisi berbagai images cloud yang sudah dikustomisasi atau siap pakai seperti LAMP, LEMP, WordPress, dll tanpa harus melakukan install paket aplikasi satu per satu.
Contohnya install WordPress secara manual sebelumnya kita harus install paket web server terlebih dahulu, yaitu Apache atau Nginx, PHP, MySQL atau MariaDB, lalu kemudian WordPress. Tapi dengan image WordPress dari Marketplace DigitalOcean semuanya sudah siap.
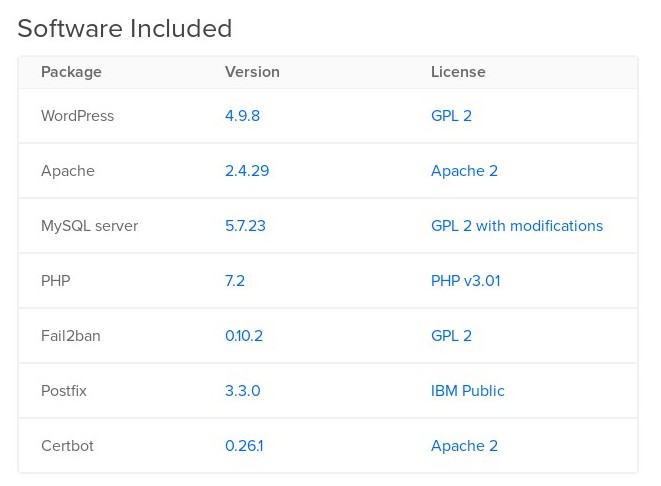
Di dalam image WordPress sudah tersedia Ubuntu, WordPress, Apache, MySQL, PHP, Fail2ban, Postfix, dan Certbot.
Membuat Droplet WordPress
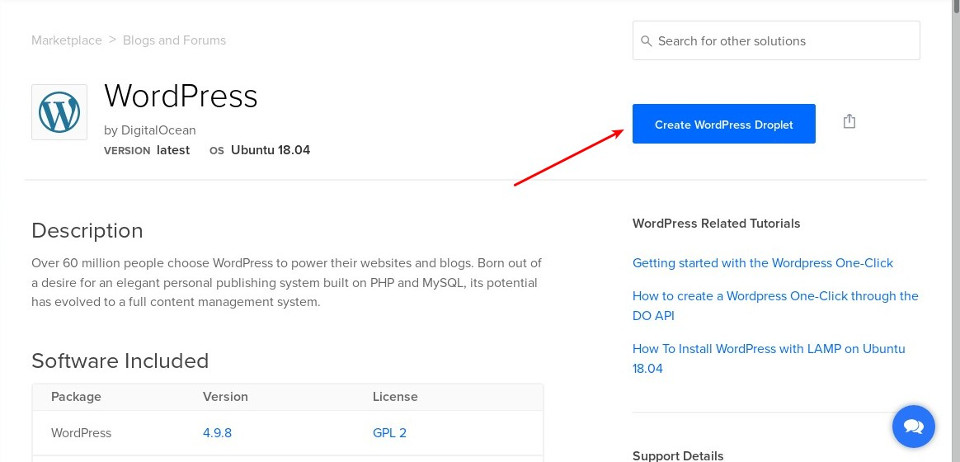
Login ke dashboard DigitalOcean, klik menu Discover -> Markeplace.
Gunakan kolom Search keyword untuk memudahkan pencarian image WordPress.

Lalu klik Create WordPress Droplet.
Lanjutkan dengan memilih spesifikasi droplet, lokasi server, SSH key jika ingin login tanpa password, dan hostname.
Lalu klik Create Droplet.
DNS Records
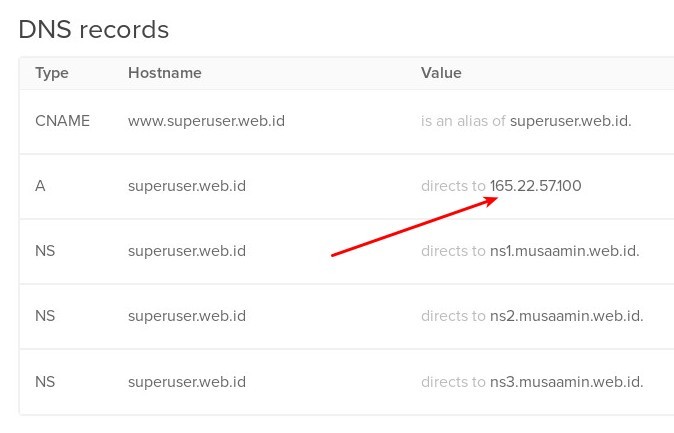
Pasang IP VPS (Droplet) pada A record DNS.
Konfigurasi Droplet
Login SSH ke droplet WordPress yang telah dibuat.
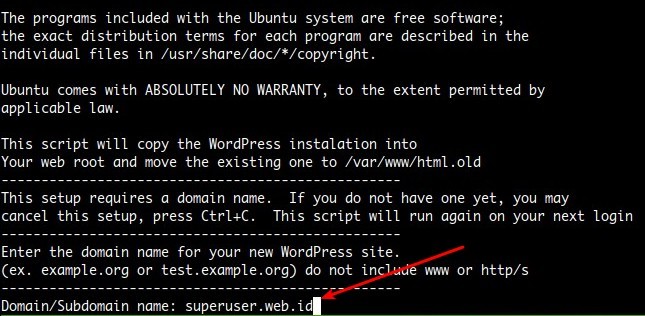
Masukkan nama domain.
1 2 3 4 | Enter the domain name for your new WordPress site. (ex. example.org or test.example.org) do not include www or http/s -------------------------------------------------- Domain/Subdomain name: superuser.web.id |
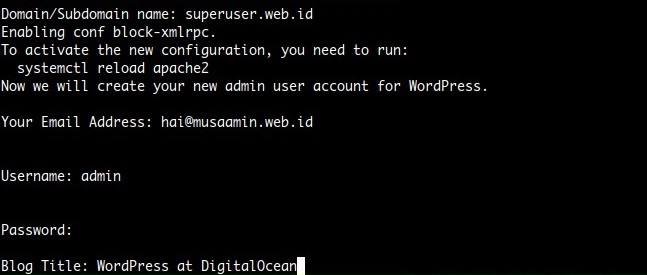
Masukkan email, username, dan password untuk akun administrator WordPress.
1 2 3 4 5 6 | Now we will create your new admin user account for WordPress. Your Email Address: hai@musaamin.web.id Username: admin Password: Blog Title: WordPress at DigitalOcean |
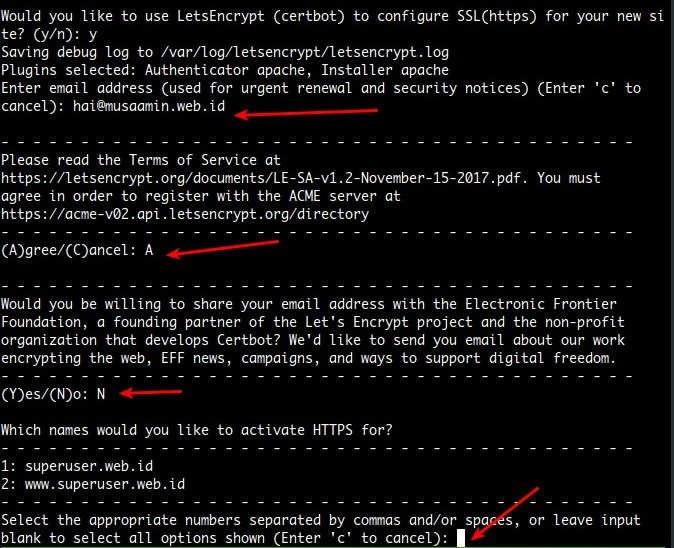
Gunakan Let’s Encrypt untuk sertifikat SSL (HTTPS).
1 2 3 4 5 6 7 8 9 10 11 12 13 14 15 16 17 18 19 20 21 22 23 24 25 26 27 28 29 30 31 32 33 34 | Would you like to use LetsEncrypt (certbot) to configure SSL(https) for your new site? (y/n): y - - - - - - - - - - - - - - - - - - - - - - - - - - - - - - - - - - - - - - - - Please read the Terms of Service at https://letsencrypt.org/documents/LE-SA-v1.2-November-15-2017.pdf. You must agree in order to register with the ACME server at https://acme-v02.api.letsencrypt.org/directory - - - - - - - - - - - - - - - - - - - - - - - - - - - - - - - - - - - - - - - - (A)gree/(C)ancel: A - - - - - - - - - - - - - - - - - - - - - - - - - - - - - - - - - - - - - - - - Would you be willing to share your email address with the Electronic Frontier Foundation, a founding partner of the Let's Encrypt project and the non-profit organization that develops Certbot? We'd like to send you email about our work encrypting the web, EFF news, campaigns, and ways to support digital freedom. - - - - - - - - - - - - - - - - - - - - - - - - - - - - - - - - - - - - - - - - (Y)es/(N)o: N Which names would you like to activate HTTPS for? - - - - - - - - - - - - - - - - - - - - - - - - - - - - - - - - - - - - - - - - 1: superuser.web.id 2: www.superuser.web.id - - - - - - - - - - - - - - - - - - - - - - - - - - - - - - - - - - - - - - - - Select the appropriate numbers separated by commas and/or spaces, or leave input blank to select all options shown (Enter 'c' to cancel): ENTER Please choose whether or not to redirect HTTP traffic to HTTPS, removing HTTP access. - - - - - - - - - - - - - - - - - - - - - - - - - - - - - - - - - - - - - - - - 1: No redirect - Make no further changes to the webserver configuration. 2: Redirect - Make all requests redirect to secure HTTPS access. Choose this for new sites, or if you're confident your site works on HTTPS. You can undo this change by editing your web server's configuration. - - - - - - - - - - - - - - - - - - - - - - - - - - - - - - - - - - - - - - - - Select the appropriate number [1-2] then [enter] (press 'c' to cancel): 2 |
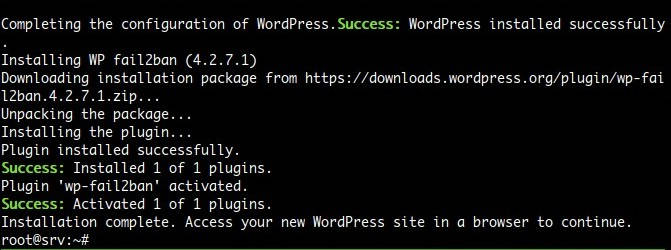
Selanjutnya system melakukan install dan konfigurasi secara otomatis.
Akan ditampilkan pesan Installation complete. Access your new WordPress site in a browser to continue jika install berhasil.
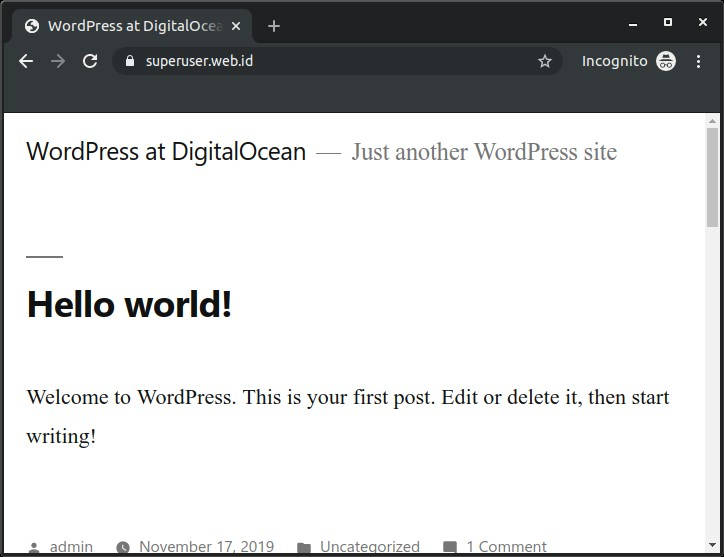
Akses WordPress
Terakhir melakukan pengujian akses ke domain apakah WordPress sudah terinstall dengan baik.
Gratis saldo $100 untuk pendaftaran baru di DigitalOcean. Daftar sekarang juga.
Selamat mencoba 🙂
lah min, kok ns1, ns2,ns3 nya di gw ns1.digitalocean.com ???
di tutorial kok ns1.musaamin.web.id
saya pakai private nameserver, setting di penyedia domain.
maaf oot mas.
mau tanya klo untuk vps yang support website film dimana ya.
bukan untuk upload videonya tapi cuma website film. video nya sudah ada.
thanks.
saya belum tau di mana bisa sewa VPS khusus film, coba tanya di group Facebook WordPress Indonesia
Cara nambah domain gmn ya ?
setting virtual host di apache dan pointing domainnya ke ip server (a record di dns)
maaf gan mau tanya gimana caranya seting domain bila kena dos ?
coba setting limit request di web server dan pasang Cloudflare
sudah gan tapi belom ada efeknya