How to use an Android camera as a Webcam on Ubuntu 20.04
I need a webcam to do a video conference, but the video quality of the resulting laptop webcam is not good. Want to buy a good USB webcam is expensive too. In addition, the webcam is urgent to use, it will take too long to wait for the delivery of goods.
I have a Redmi Note 8 Android phone, then thought whether to use the camera from an Android phone as a webcam in Ubuntu, and it can be done.
0.Configuration on Android
First activate the Developer Options feature on an Android phone. To activate it, go to Settings -> About phone -> Android version. Tap Android version 7 times.
Then come back and go back to Settings, already active Developer optons menu. I am using Redmi Note 8 with Android 9 (MIUI 11), the menu Developer options is located at Settings -> Additional settings.
Under Developer options, enable USB debugging.
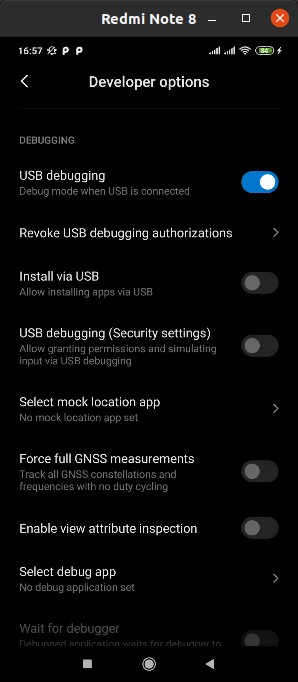
I chose a more stable USB connection, using the wireless connection it always disconnects.
1.Configuration on Ubuntu
Install the required dependency packages.
1 | sudo apt install gcc make adb |
Download and extract the DroidCam client for Linux.
1 2 3 | cd /tmp wget https://files.dev47apps.net/linux/droidcam_latest.zip unzip droidcam_latest.zip -d droidcam |
Install DroidCam.
1 2 3 | cd droidcam sudo ./install-client sudo ./install-video |
Verify whether the installed module is installed.
1 2 3 4 | lsmod | grep v4l2loopback_dc v4l2loopback_dc 24576 1 videodev 225280 2 v4l2loopback_dc |
Change the camera resolution configuration.
1 | sudo nano /etc/modprobe.d/droidcam.conf |
The contents are as below. Change the width and height options. Camera resolution size is 640×480, 960×720, 1280×720 (720p), 1920×1080 (1080p).
1 | options v4l2loopback_dc width=960 height=720 |
For sound support, install it below.
1 | sudo ./install-sound |
Next create an application shortcut.
1 | nano ~/.local/share/applications/droidcam.desktop |
Enter the configuration below.
1 2 3 4 5 6 7 8 9 10 | [Desktop Entry] Version=1.0 Type=Application Terminal=false Name=DroidCam Exec=droidcam Comment=Use your Android phone as a wireless webcam or an IP Cam! Icon=droidcam Categories=GNOME;GTK;Video;Android; Name[it]=droidcam |
Install the Cheese application if it is not yet available, an application to take photos and videos from the webcam, will be used in testing.
1 | sudo apt install cheese |
2.DroidCam via WiFi
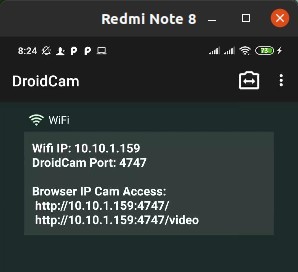
Run the DroidCam application on an Android phone, the IP address of the Android phone will be displayed.
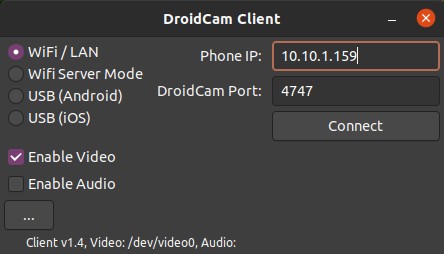
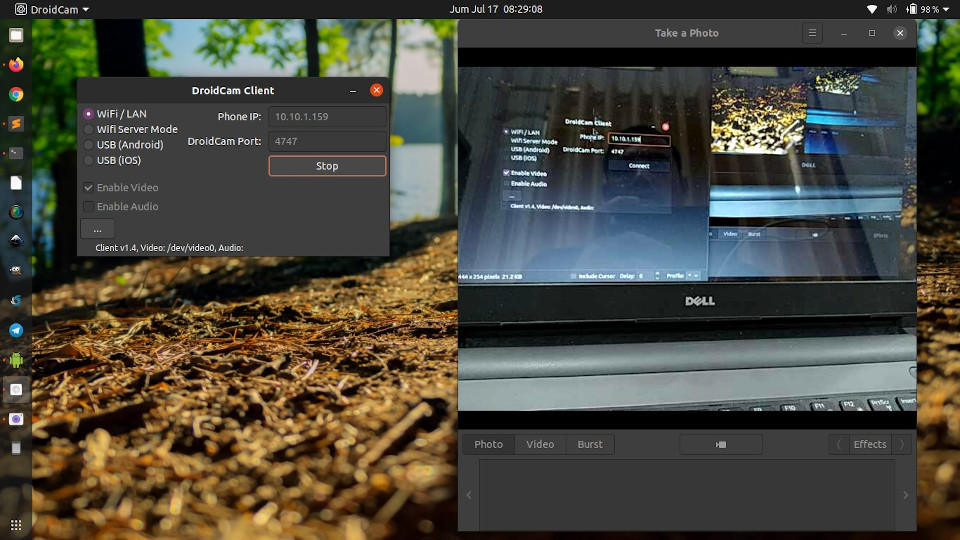
Next, run DroidCam on Ubuntu, select WiFI/LAN and enter the IP address of your Android phone. Then click Connect.
Then run the Cheese application to test whether the camera from the Android phone is connected to Ubuntu.
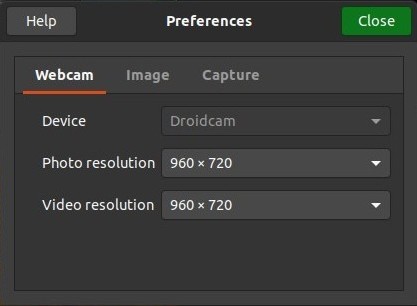
Look at Preferences Cheese there is Device with the name Droidcam.
3.DroidCam via USB
For DroidCam via USB, select USB (Android) in the DroidCam Client app on Ubuntu.
If you found this article helpful and would like to support my work, consider making a donation through PayPal. Your support helps me continue creating useful content and tutorials. Thank you!
Donate via PayPal: https://paypal.me/musaamin

great tutorial, but this section not worked for me
“First activate the Developer Options feature on an Android phone. To activate it, go to Settings -> About phone -> Android version. Tap Android version 7 times.”
after do some googling, i found that we must tap “MIUI Version” 7 times, not Android version. But thanks for your tutorial.. i can use my phone for webcam , thats better than using my original webcam
Thanks!! it really worked.
Being novice to ubuntu ,dont know What to do at the end of these commands?
[Desktop Entry]
Version=1.0
Type=Application
Terminal=false
Name=DroidCam
Exec=droidcam
Comment=Use your Android phone as a wireless webcam or an IP Cam!
Icon=droidcam
Categories=GNOME;GTK;Video;Android;
Name[it]=droidcam
==what next?
Save CTRL+O, Exit CTRL+X