Cara Install Nextcloud Client di Ubuntu 20.04

Pada artikel sebelumnya saya sudah membahas tentang bagaiamana cara install Nextcloud server di CentOS 8. Sekarang lanjut ke tahapan bagaimana cara membuat user dan install aplikasi Nexcloud client di Ubuntu 20.04.
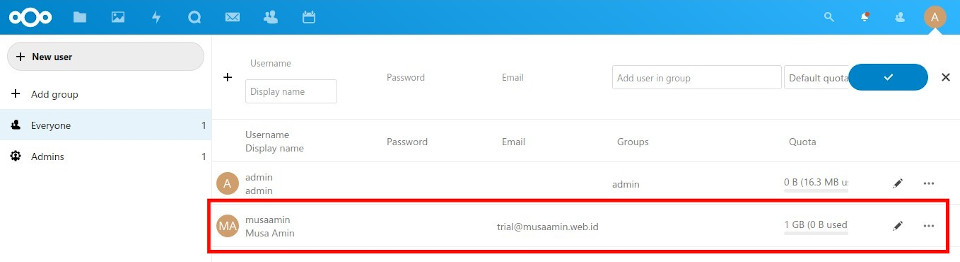
1. Membuat User Nexcloud
Langkah pertama adalah membuat user account di Nextcloud.
- Login dengan menggunakan admin account di Nextcloud.
- Klik menu Settings->Users.
- Klik tombol + New user.
- Masukkan Username, Display name, Password, Email, dan Quota.
- Klik tombol centang.

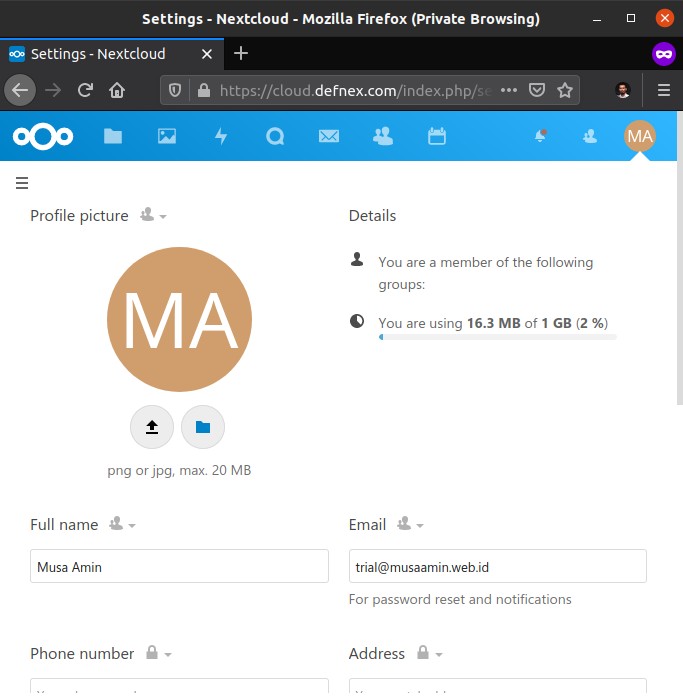
2. Pengujian User Baru
Langkah selanjutnya menguji user account yang baru saja dibuat.
- Logout terlebih dahulu dari Nextcloud.
- Login kembali ke Nextcloud dengan menggunakan user account yang baru.
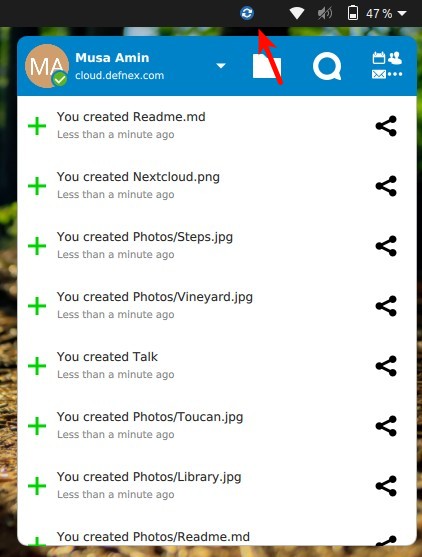
- Uji coba dengan membuat file atau folder.
- Untuk mengubah informasi user account, klik menu Settings->Personal info.
3. Install Nextcloud client
Nextcloud client tersedia untuk sistem operasi Windows, macOS, dan Linux. Untuk distribusi Linux openSUSE Tumbleweed, Arch Linux, dan Fedora sudah tersedia di repository. Untuk Ubuntu dan Debian tersedia di PPA repository. Tersedia juga dalam format AppImage untuk aplikasi portable Linux.
Di sini saya menggunakan Nextcloud client format AppImage dan dijalankan di Ubuntu 20.04. Saya memilih AppImage karena portable dan tidak harus menambah repository lagi.
- Download Nextcloud.AppImage.
- Pindahkan Nextcloud.AppImage ke folder home agar mudah dicari atau diakses.
- Klik kanan Nextcloud.AppImage, menu Properties, tab Permissions, dan centang Allow executing file as program. Lalu close.
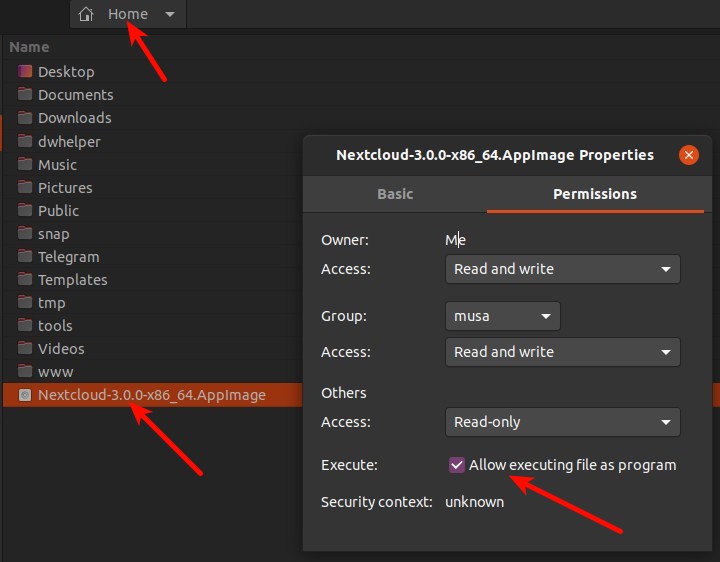
Nextcloud AppImage Permissions - Klik 2 kali Nextcloud.Appimage untuk menjalankan aplikasinya.
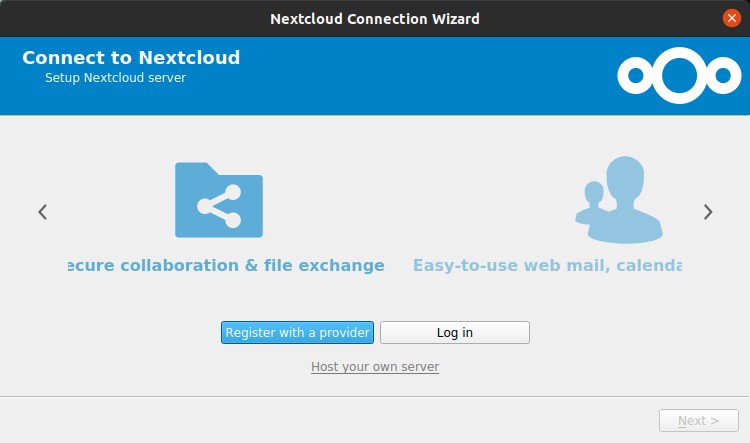
- Klik Log in.
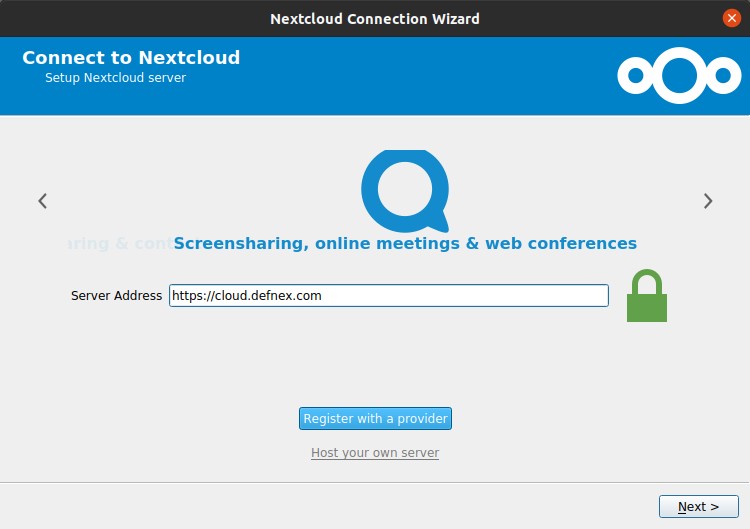
Nextcloud client – Log in - Masukkan Server Address.
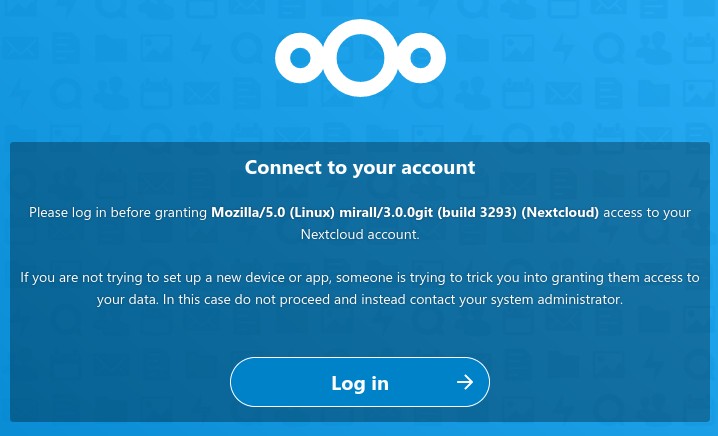
Nextcloud client – Server Address - Nextcloud client secara otomatis akan membuka browser dan meminta untuk login ke Nextcloud server. Klik Log in.
Nextcloud – Connect to account - Setelah login, klik Grant access untuk memberikan akses kepada Nextcloud client.
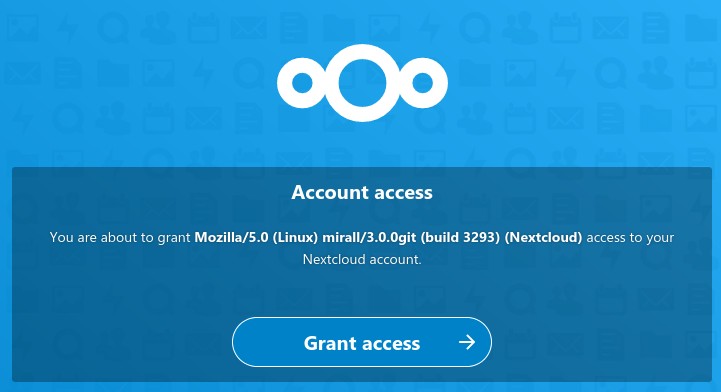
Nextcloud – Grant access - User account sudah terhubung dengan Nextcloud client. Window ini sudah bisa ditutup.

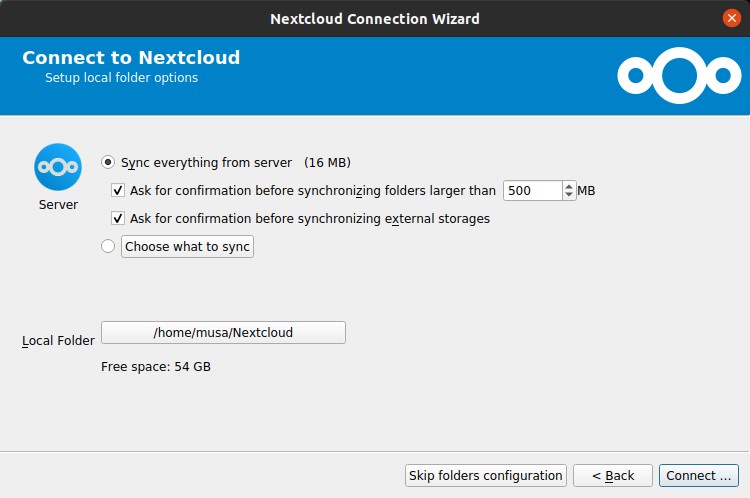
Nextcloud – Account connected - Nextcloud client meminta konfigurasi local folder. Secara default folder sinkronisasi berada di /home/user/Nextcloud. Local folder ini bisa diubah atau ditambah. Klik Connect ….
Nextcloud client – Local folder options - Nextcloud client mulai menjalankan sinkronisasi dari remote folder ke local folder.
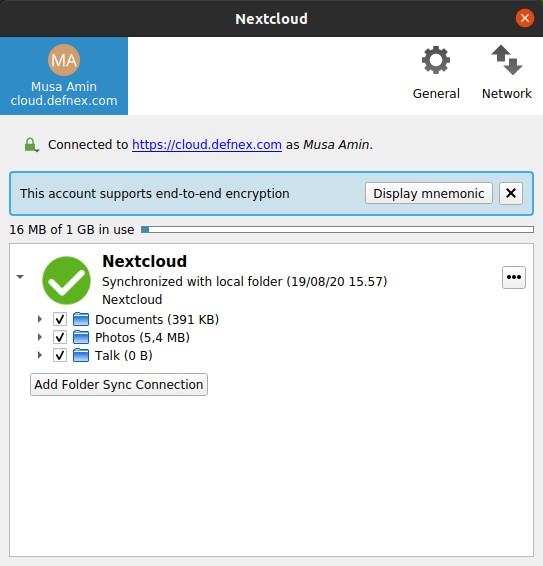
Nextcloud client – Synchronizing - Local folder sudah tersinkronisasi.
Nextcloud client – Synchronized
Selamat mencoba 🙂