How to Create a Virtual Machine with KVM on Ubuntu 20.04

Kernel-based Virtual Machine (KVM) is a module build directly into the Linux kernel that allows the operating system to act as a hypervisor (software to create virtual machines).
1. Check virtualization support
Before installing KVM on Ubuntu, we need to check first whether the hardware used supports KVM. The minimum requirement for a KVM installation is the availability of a CPU virtualization extension such as Intel-VT or AMD-V.
Check if the CPU supports virtualization:
1 2 3 | egrep -c '(vmx|svm)' /proc/cpuinfo 4 |
If the result is not 0 it means the hardware supports virtualization. But if not, the hardware doesn’t support virtualization or the feature hasn’t been enabled in the BIOS.
Install cpu-checker:
1 | sudo apt install cpu-checker -y |
Run kvm-ok to check if it supports KVM:
1 2 3 4 | sudo kvm-ok INFO: /dev/kvm exists KVM acceleration can be used |
The results show that the hardware supports KVM.
2. Install KVM
Install KVM, virt-manager, bridge-utils, and other dependencies:
1 | sudo apt install qemu qemu-kvm libvirt-daemon libvirt-clients bridge-utils virt-manager -y |
Installed package functions:
- qemu (quick emulator): application that perform hardware virtualization.
- qemu-kvm: the main package of KVM.
- libvirt-daemon: virtualization daemon.
- bridge-utils: create a bridge connection for the network.
- virt-manager: application for virtual machine management with a graphical interface.
To be able to set up a virtual machine without root access, put the user in the libvirt and libvirt-qemu group.
1 2 | sudo adduser $USER libvirt sudo adduser $USER libvirt-qemu |
Qemu configuration:
1 | sudo nano /etc/libvirt/qemu.conf |
Change the values of user and group to be the user you are using:
1 2 | user = "musaamin" group = "musaamin" |
Restart Ubuntu:
1 | sudo reboot |
Check if the virtualization daemon is running:
1 | sudo systemctl status libvirtd |
Check if the KVM module is loaded:
1 2 3 4 | lsmod | grep -i kvm kvm_intel 282624 0 kvm 663552 1 kvm_intel |
3. Create a Virtual Machine
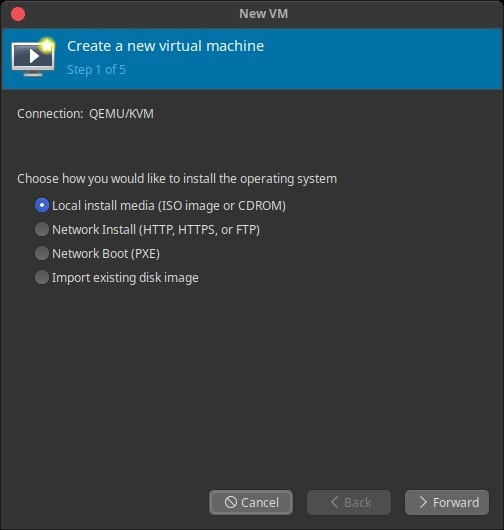
Run Virtual Machine Manager, then click File-> New Virtual Machine menu.
Select Local install media (ISO image or CDROM) for OS installation from ISO or CDROM.
Then Forward.
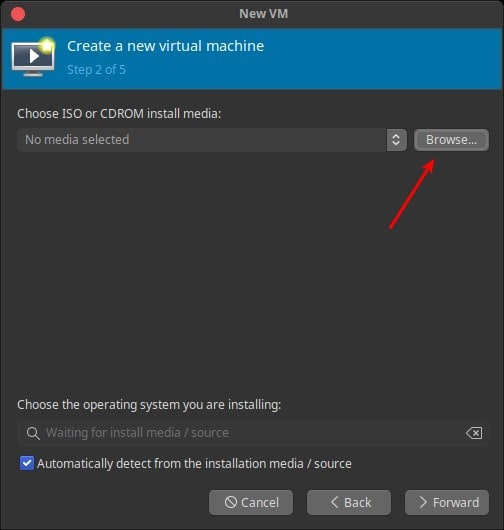
Click Browse … to select the ISO image.
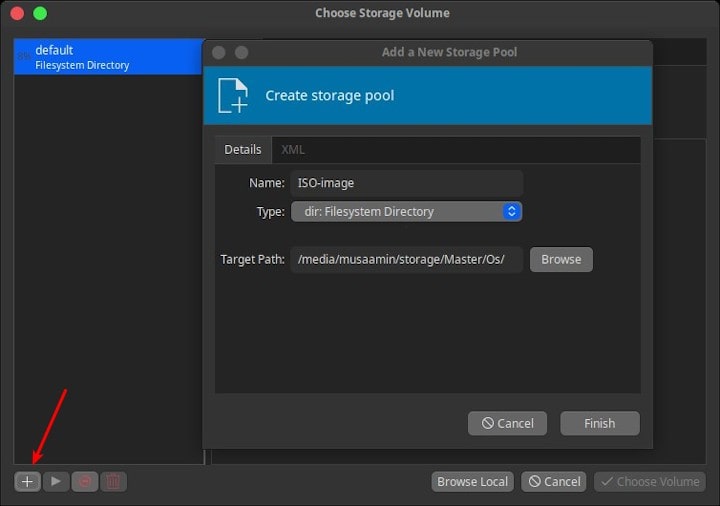
The Choose Storage Volume window will open. Click the + button to create Create storage pool.
Enter Name for the storage pool name, Type for dir: Filesystem Directory, and Target Path for the folder location ISO file storage.
Then Finish.
Select the ISO image you want to use.
Then click Choose Volume.

Then Forward.
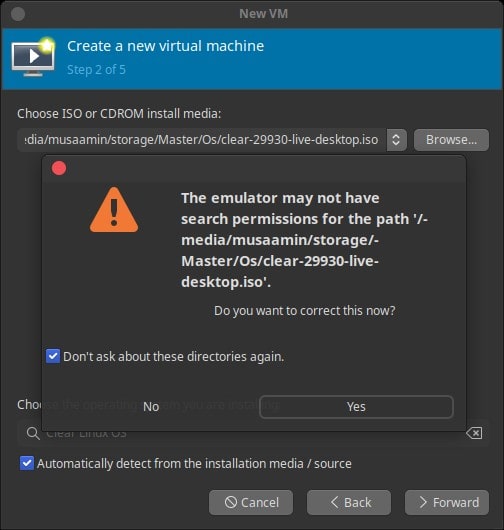
The question appears as in the image below, answer Yes, and check Don’t ask about these directories again.
Enter the amount of memory and CPU you want to use.

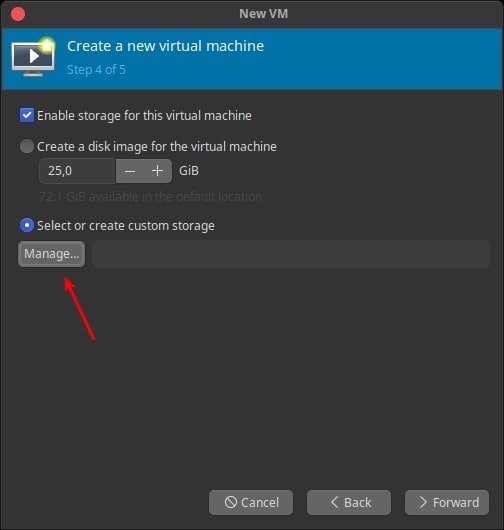
To create storage for the virtual machine, check Enable storage for this virtual machine.
Click Create a disk image for the virtual machine and enter the storage space. Image files are stored in Default Storage Pool, in the /var/lib/libvirt/images folder.
Or click Select or create custom storage, then click Manage … to create a new storage pool and custom storage.
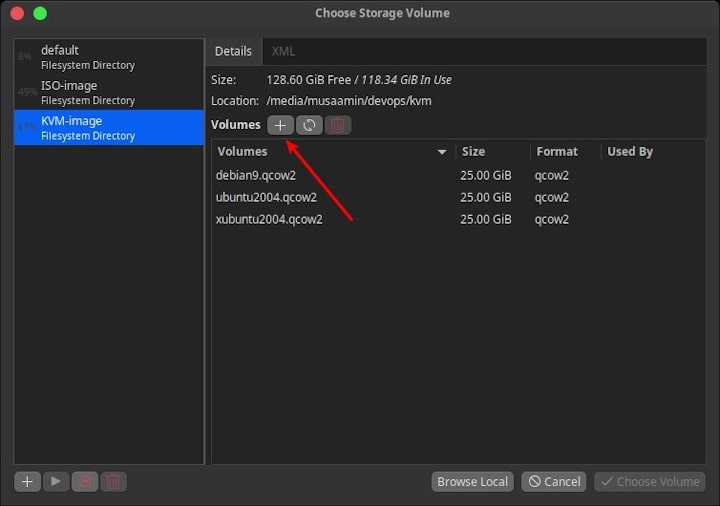
After creating a Storage Pool for storage, create a new volume.
Then click Volumes +.
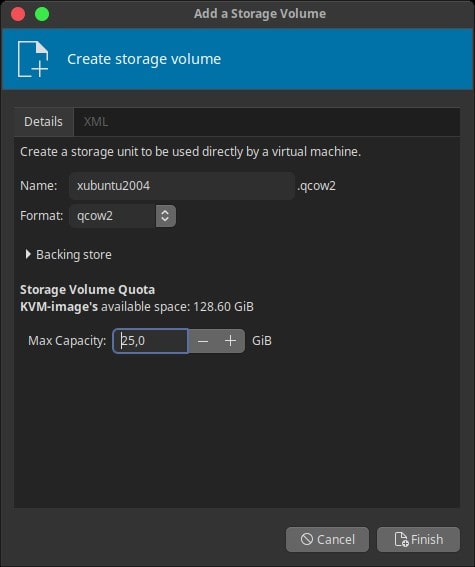
Enter Name, and Max Capacity.
Then Finish.
Then Choose Volume.
Then Forward.
Then Finish.
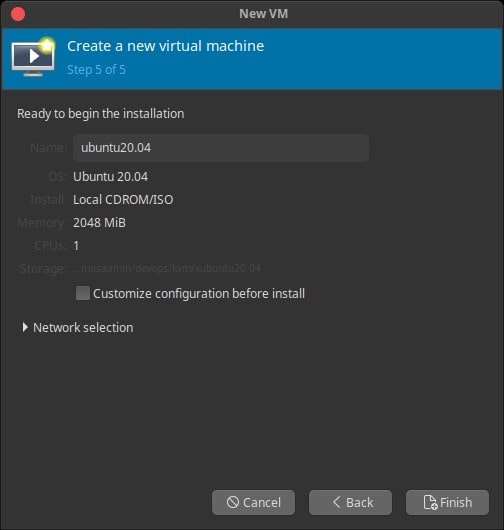
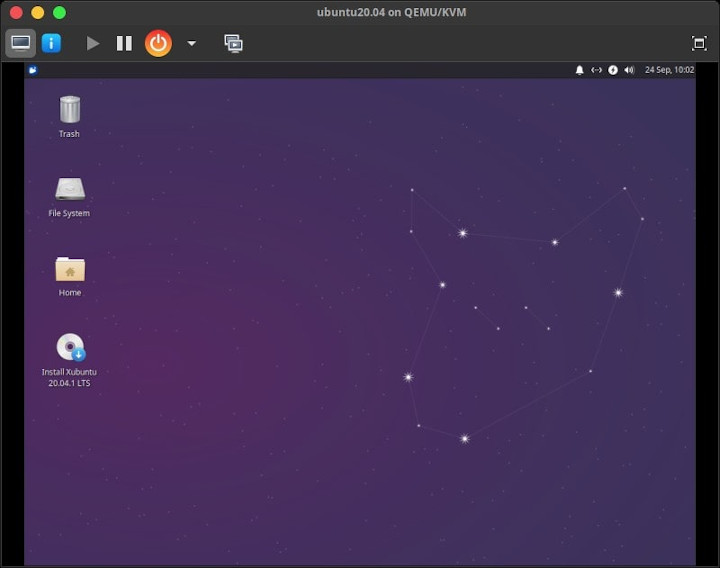
If successful, the virtual machine starts immediately.
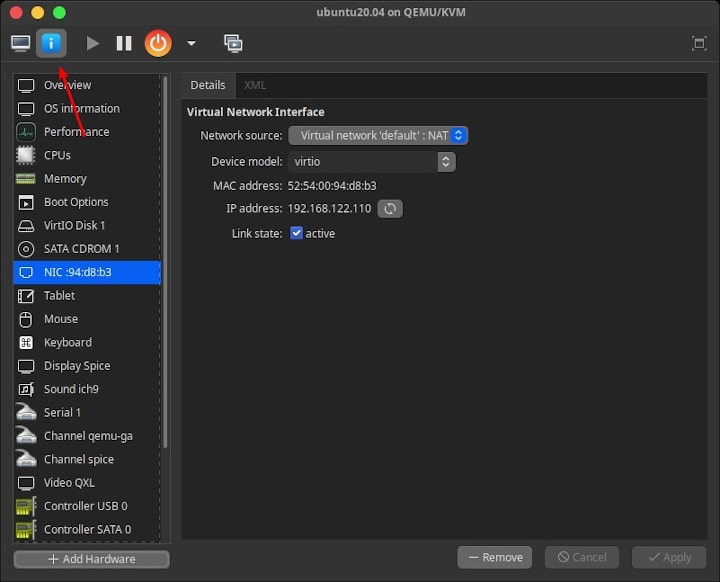
Click the button i. Show virtual hardware details, to display and manage the hardware of the virtual machine.
By default, the virtual network used is NAT, the virtual machine can connect to the internet, and can also connect to Host OS.
If you found this article helpful and would like to support my work, consider making a donation through PayPal. Your support helps me continue creating useful content and tutorials. Thank you!
Donate via PayPal: https://paypal.me/musaamin