How to install DSpace 6 on Ubuntu 20.04
In this tutorial we will learn how to install DSpace on Ubuntu 20.04. DSpace is open source software for building repositories, generally used by academic institutions.
Hardware Recommendations
Recommended hardware as a DSpace server.
Minimal DSpace Production
- 3-4GB RAM
- 20GB Storage
Mid-range DSpace Production
- 5-6GB RAM
- 200GB Storage
High-end DSpace Production
- 9-10GB RAM
- 1TB Storage
Software Requirements
Software needed to run DSpace.
- Java JDK 8
- Apache Maven
- Apache Ant
- PostgreSQL
- Apache Tomcat
Create User
Create a dspace user.
1 2 | sudo useradd -m dspace sudo passwd dspace |
Install PostgreSQL
Install PostgreSQL database.
1 | sudo apt install postgresql postgresql-client -y |
Create user dspace with password dspace in PostgreSQL.
1 2 3 | sudo su postgres createuser -U postgres -d -A -P dspace exit |
Create a database for dspace.
1 | sudo -u dspace createdb -U dspace -E UNICODE dspace |
Activating the pgcrypto extension.
1 2 3 | sudo su postgres psql --username=postgres dspace -c "CREATE EXTENSION pgcrypto;" exit |
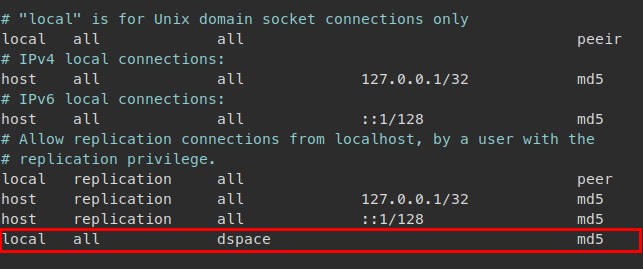
Open the PostgreSQL configuration file pg_hba.conf.
1 | sudo nano /etc/postgresql/12/main/pg_hba.conf |
Add the following configuration.
1 | local all dspace md5 |
Restart PostgreSQL.
1 2 | sudo systemctl restart postgresql sudo systemctl status postgresql |
Building DSpace
Install OpenJDK 8.
1 | sudo apt install openjdk-8-jdk -y |
If another version of OpenJDK has been installed previously, change the default java to OpenJDK 8.
1 | sudo update-alternatives --config java |
Install ant and maven.
1 | sudo apt install ant maven -y |
Create a dspace folder.
1 2 | sudo mkdir /dspace sudo chown dspace /dspace |
Create a build folder for building DSpace.
1 2 3 | sudo mkdir /build sudo chmod -R 777 /build cd /build |
Download DSpace 6.3 from GitHub.
1 | wget https://github.com/DSpace/DSpace/releases/download/dspace-6.3/dspace-6.3-src-release.tar.gz |
Extract dspace*.tar.gz.
1 | tar xzvf dspace*.tar.gz |
Move to the dspace-6.3-src-release folder.
1 | cd dspace-6.3-src-release |
Copy the local.cfg file.
1 | cp dspace/config/local.cfg.EXAMPLE dspace/config/local.cfg |
Compile the DSpace package.
1 | mvn -U package |
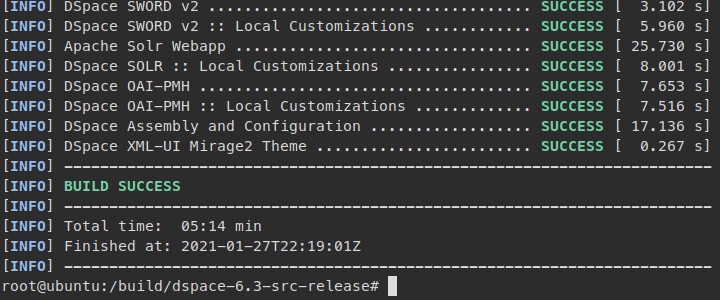
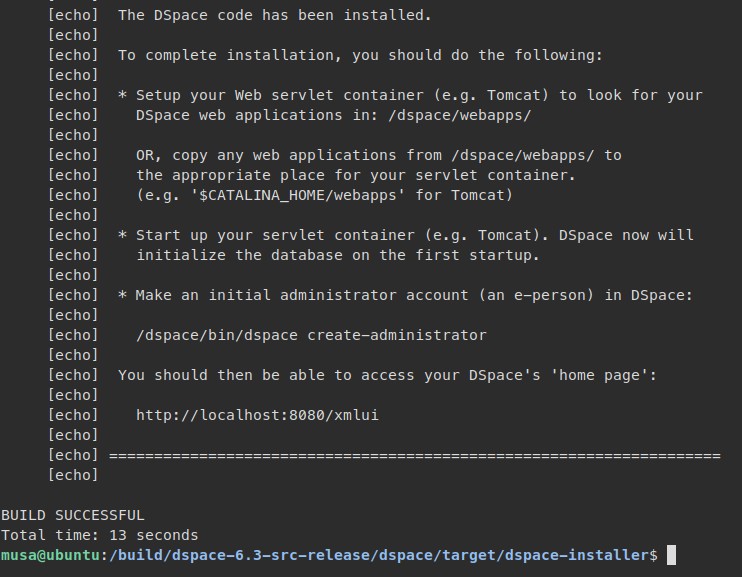
Install DSpace.
1 2 | cd dspace/target/dspace-installer sudo ant fresh_install |
Install Apache Tomcat
Download and extract Apache Tomcat 9.
1 2 3 | cd /opt sudo wget https://downloads.apache.org/tomcat/tomcat-9/v9.0.41/bin/apache-tomcat-9.0.41.tar.gz sudo tar xzvf apache-tomcat-9.0.41.tar.gz |
Rename the apache-tomcat-9.0.41 folder to tomcat.
1 | sudo mv apache-tomcat-9.0.41 tomcat |
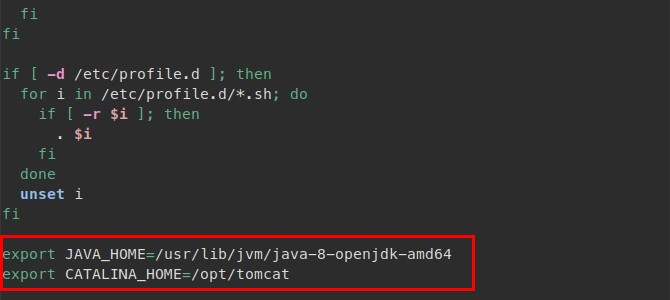
Open the /etc/profile file.
1 | sudo nano /etc/profile |
Add configuration environment variables for Java.
1 2 | export JAVA_HOME=/usr/lib/jvm/java-8-openjdk-amd64 export CATALINA_HOME=/opt/tomcat |
Copy dspace webapps to tomcat webapps.
1 | sudo cp -r /dspace/webapps/* /opt/tomcat/webapps |
Create a bash script so that Tomcat can run automatically.
1 | sudo nano /etc/init.d/tomcat |
Enter the following bash script.
1 2 3 4 5 6 7 8 9 10 11 12 13 14 15 16 17 18 19 20 21 22 23 24 25 | #!/bin/bash ### BEGIN INIT INFO # Provides: tomcat8 # Required-Start: $network # Required-Stop: $network # Default-Start: 2 3 4 5 # Default-Stop: 0 1 6 # Short-Description: Start/Stop Tomcat server ### END INIT INFO PATH=/sbin:/bin:/usr/sbin:/usr/bin start() { sh /opt/tomcat/bin/startup.sh } stop() { sh /opt/tomcat/bin/shutdown.sh } case $1 in start|stop) $1;; restart) stop; start;; *) echo "Run as $0 <start|stop|restart>"; exit 1;; esac |
Give executable permissions and set it as a service.
1 2 | sudo chmod +x /etc/init.d/tomcat sudo update-rc.d tomcat defaults |
Run Tomcat server and check the status.
1 2 | sudo service tomcat start sudo service tomcat status |
DSpace Administrator
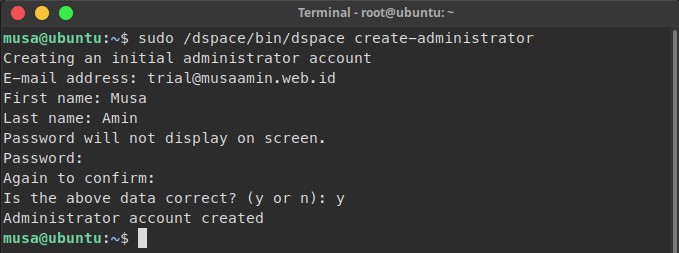
Create a DSpace administrator account.
1 | sudo /dspace/bin/dspace create-administrator |
Delete the build folder.
1 | sudo rm -rf /build |
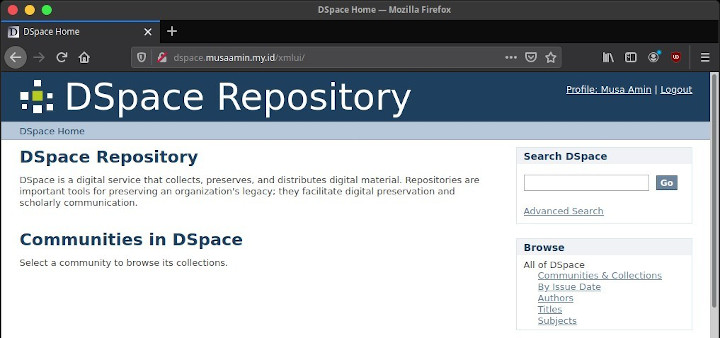
Browse DSpace site.
- http://localhost:8080/xmlui atau http://serverIP:8080/xmlui
- http://localhost:8080/jspui atau http://serverIP:8080/jspui
Access with Subdomain
Install Nginx web server.
1 | sudo apt install nginx -y |
Create a Nginx server block configuration file for the dspace.musaamin.my.id subdomain.
1 | sudo nano /etc/nginx/conf.d/dspace.musaamin.my.id.conf |
Enter the configuration below.
1 2 3 4 5 6 7 8 9 10 11 12 13 14 15 16 17 18 19 20 21 22 23 24 25 26 27 28 29 | server { listen 80; server_name dspace.musaamin.my.id; access_log /var/log/nginx/dspace.musaamin.my.id_access.log; error_log /var/log/nginx/dspace.musaamin.my.id_error.log; root /opt/tomcat/webapps/; client_max_body_size 100M; location / { return 301 /xmlui; } location /xmlui { index index.jsp; proxy_set_header X-Forwarded-Host $host; proxy_set_header X-Forwarded-Server $host; proxy_set_header X-Forwarded-For $proxy_add_x_forwarded_for; proxy_pass http://localhost:8080/xmlui; proxy_redirect http://localhost:8080/xmlui http://dspace.musaamin.my.id/xmlui; proxy_buffering off; proxy_store off; proxy_connect_timeout 120; proxy_send_timeout 120; proxy_read_timeout 120; } } |
Nginx configuration test.
1 | sudo nginx -t |
If there is no mistake.
1 2 | nginx: the configuration file /etc/nginx/nginx.conf syntax is ok nginx: configuration file /etc/nginx/nginx.conf test is successful |
Restart Nginx.
1 | sudo systemctl restart nginx |
Browse http://dspace.musaamin.my.id
Install SSL Let’s Encrypt
Install certbot Let’s Encrypt.
1 2 | sudo snap install --classic certbot sudo ln -s /snap/bin/certbot /usr/bin/certbot |
Request SSL for the subdomain dspace.musaamin.my.id on Nginx.
1 | sudo certbot --nginx -d dspace.musaamin.my.id |
If the SSL install is successful, the message below will be displayed.
1 | Congratulations! You have successfully enabled https://dspace.musaamin.my.id |
Browse https://dspace.musaamin.my.id
If you found this article helpful and would like to support my work, consider making a donation through PayPal. Your support helps me continue creating useful content and tutorials. Thank you!
Donate via PayPal: https://paypal.me/musaamin

Thank you for this manual for installing DSpace on Ubuntu20.04 LTS. I’ve been getting BUILD FAILURE when try to use the command “sudo ant fresh_install”. Kindly help me to overcome this challenge. Thank you.
check local.cfg, database connection
Wonderful. Worked like a charm.
how do I make changes to the interface?
User Interface Customization