How to Install EPrints on Ubuntu 18.04

EPrints is a free and open source software for document management system, which is more commonly implemented as a university repository that stores scientific work documents such as thesis, dissertation, and research journals.
0.Install EPrints
Create an EPrints repository file for installation.
1 | nano /etc/apt/sources.list.d/eprints.list |
Enter the repository eprints address.
1 | deb http://deb.eprints-hosting.org/3.4/stable/ ./ |
Download key repository and updates.
1 2 | wget -O - http://deb.eprints-hosting.org/keyFile | apt-key add - apt update |
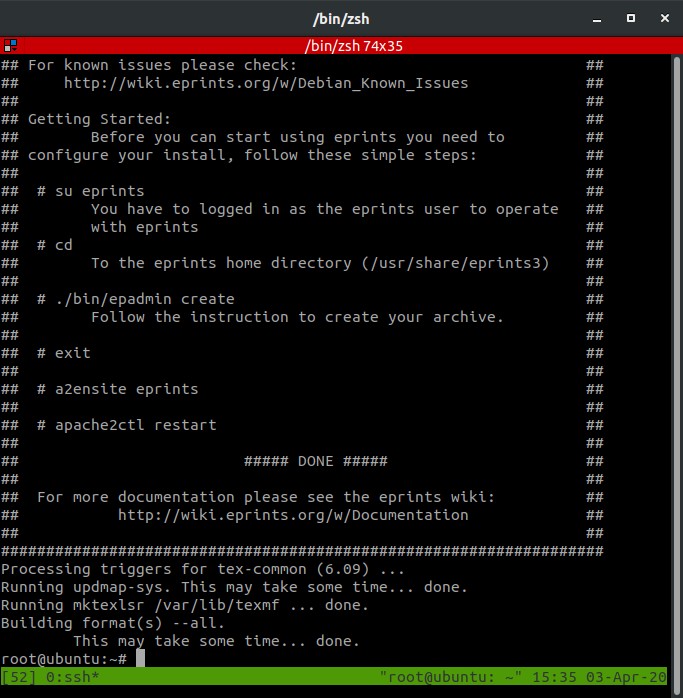
Installing eprints.
1 | apt install eprints -y |

1.Creating MySQL User
Login to MySQL with the root user.
1 | mysql -u root |
Give the password to the root user and create user eprints.
1 2 3 4 5 6 | USE mysql; ALTER USER 'root'@'localhost' IDENTIFIED WITH mysql_native_password BY 'password'; CREATE USER 'eprints'@'localhost' IDENTIFIED by 'password'; GRANT ALL PRIVILEGES ON *.* TO 'eprints'@'localhost' WITH GRANT OPTION; flush privileges; exit |
2.Configuring the EPrints Repository
Switch to user eprints and make a repository.
1 2 3 | su eprints cd ./bin/epadmin create zero |
Enter the Archive ID, for example repository.
1 2 3 4 5 6 7 | Create a zero Repository Please select an ID for the repository, which will be used to create a directory and identify the repository. Lower case letters and numbers, may not start with a number. examples: "lemurprints" or "test3" Archive ID? repository |
Configure vital settings, press ENTER.
1 2 3 4 5 6 7 8 9 | Ok. I've created the initial config files and directory structure. I've also created a "disk0" directory under documents/ if you want your full texts to be stored on a different partition then remove the disk0, and create a symbolic link to the directory you wish to store the full texts in. Additional links may be placed here to be used when the first is full. Configure vital settings? [yes] ? ENTER |
Enter the hostname / domain / ubdomain used to access EPrints, for example eprints.defnex.com.
1 2 3 4 5 6 7 8 9 10 11 | Core configuration for repository Please enter the fully qualified hostname of the repository. For a production system we recommend against using the real hostname of the machine. Example: repository.footle.ac.uk Hostname? eprints.defnex.com |
Webserver Port, press ENTER.
1 2 3 4 | Please enter the port of the webserver. This is probably 80, but you may wish to run apache on a different port if you are experimenting. Webserver Port [80] ? ENTER |
Alias, press ENTER.
1 2 3 4 5 6 7 8 9 10 11 12 13 | Please enter all the aliases which could reach the repository, and indicate if you would like EPrints to write a Redirect Rule to redirect requests to this alias to the correct URL. Some suggestions: ubuntu.mydomain.com ubuntu.mydomain ubuntu eprints.defnex eprints Enter a single hash (#) when you're done. Alias (enter # when done) [#] ? ENTER |
Path, press ENTER.
1 2 3 4 | Please enter the path part of the repository's base URL. This should probably be '/'. Path [/] ? ENTER |
HTTPS Hostname, press ENTER.
1 2 3 4 | If you will use https for your user pages (including login) enter the https hostname here, or leave blank when using http only. HTTPS Hostname [] ? ENTER |
Enter an email address for the administrator, for example [email protected].
1 | Administrator Email? eprints@defnex.com |
Enter a name for the repository, for example the Defnex Repository.
1 2 3 4 5 6 | Enter the name of the repository in the default language. If you wish to enter other titles for other languages or enter non ascii characters then you may enter something as a placeholder and edit the XML config file which this script generates. Archive Name [Test Repository] ? Repository Defnex |
Save the core settings, press ENTER.
1 | Write these core settings? [yes] ? ENTER |
1 2 3 | Wrote /usr/share/eprints/archives/repository/cfg/cfg.d/adminemail.pl Wrote /usr/share/eprints/archives/repository/cfg/cfg.d/10_core.pl Wrote /usr/share/eprints/archives/repository/cfg/lang/en/phrases/archive_name.xml |
Database configuration, press ENTER.
1 | Configure database? [yes] ? ENTER |
For example the name of the database = eprintsdb, user and password = according to the user and password that was created previously.
1 2 3 4 5 6 7 8 9 10 11 | Configuring Database for: repository Database Name [repository] ? eprintsdb MySQL Host [localhost] ? ENTER You probably don't need to set socket and port (unless you do!?). MySQL Port (# for no setting) [#] ? ENTER MySQL Socket (# for no setting) [#] ? ENTER Database User [repository] ? eprints Database Password [M5nJ547p] ? password Database Engine [InnoDB] ? ENTER Write these database settings? [yes] ? ENTER |
Create database, press ENTER.
1 2 3 | EPrints can create the database, and grant the correct permissions. Create database "eprintsdb" [yes] ? ENTER |
Enter the username and password that was created before.
1 2 3 | Database Superuser Username [root] ? eprints Database Superuser Password? password Create database tables? [yes] ? ENTER |
Create an intial user, press ENTER.
1 2 | Create an initial user? [yes] ? ENTER Creating a new user in repository |
username = admin, type = admin, password = password, email = [email protected].
1 2 3 4 5 6 7 | Enter a username [admin] ? ENTER Select a user type (user|editor|admin) [admin] ? ENTER Enter Password? password Email? eprints@defnex.com Successfully created new user: ID: 1 |
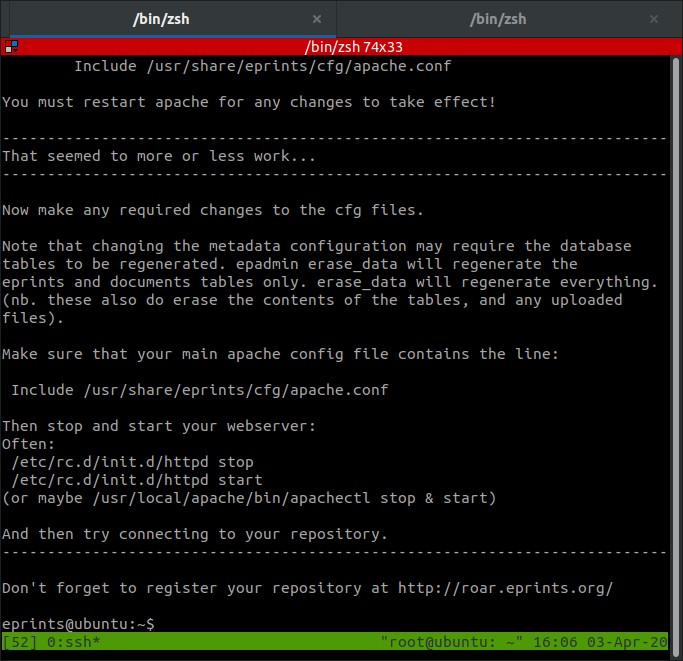
Do you want to build the static web pages, press ENTER.
1 | Do you want to build the static web pages? [yes] ? ENTER |
Do you want to update the apache config files, press ENTER.
1 | Do you want to update the apache config files? (you still need to add the 'Include' line) [yes] ? ENTER |

Exit user eprints.
1 | exit |
Enable virtual host eprints and restart apache.
1 2 | a2ensite eprints systemctl restart apache2 |
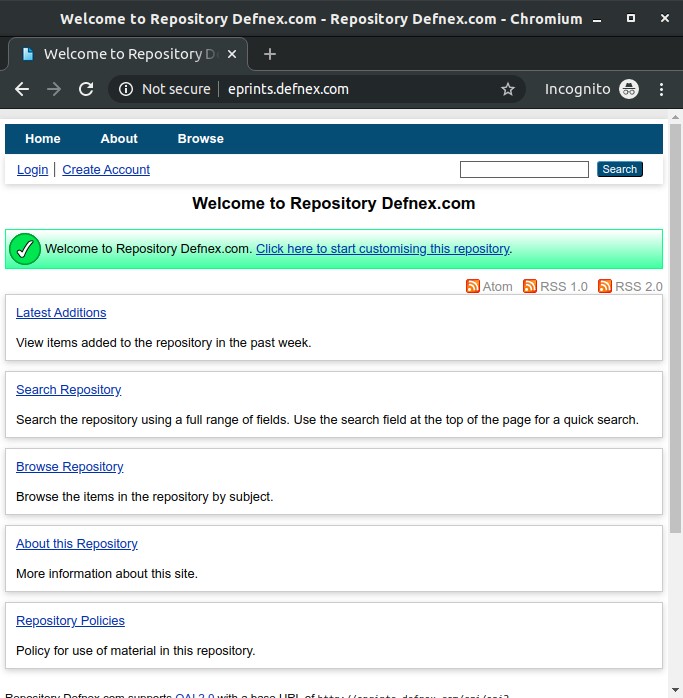
Browse http://eprints.defnex.com.

If you found this article helpful and would like to support my work, consider making a donation through PayPal. Your support helps me continue creating useful content and tutorials. Thank you!
Donate via PayPal: https://paypal.me/musaamin


selamat siang pak, mau bertanya, bagaimana caranya untuk mengakses di localhost? apakah diperlukan dns? saya sudah berhasil install tetapi masih belum bisa mengakses via web browser
di localhost berarti aksesnya di pc sendiri? coba config file etc/hosts. tuliskan di situ
127.0.0.1 domain.local.Selamat pagi pak.
Saya telah mengikuti arahan tutorial bapak dan kelihatannya hasil instalasi selesai dan berhasil. Tp saya ingin menggunakan aplikasi eprints ini secara localhost. Disinilah saya menemui kendalanya. Pd konfigurasi eprints pada bagian hostname saya hanya buat namanya eprints saja. Bagaimana cara agar saya bisa menggunakan eprints secara localhost (non-cloud)? Terima kasih sebelumnya.
coba buat nama domain sendiri dgn file
/etc/hostsAlhamdulillah pak terima kasih sudah sangat membantu. Saya sdh berhasil konfigurasinya dan telah bisa buka tiap menu. Mohon ijin mengcopy tulisan bapak ini untuk referensi saya pak. Terima kasih.
silakan pak
Selamat pagi pak. Dari hasil tutorial sdh diikuti tp setelah running localhost(127.0.0.1) saya tidak bisa login ataupun create user. Timbul web page error atau tdk ditemukan.
Mas, mohon arahan, sya kok nda bisa lanjut dari tahapan ke 2, download key repository dan uodatesnya ga bisa lanjut. kira” masalahnya apa yah? mohon arahan?
keluar dulu dari text editor nano